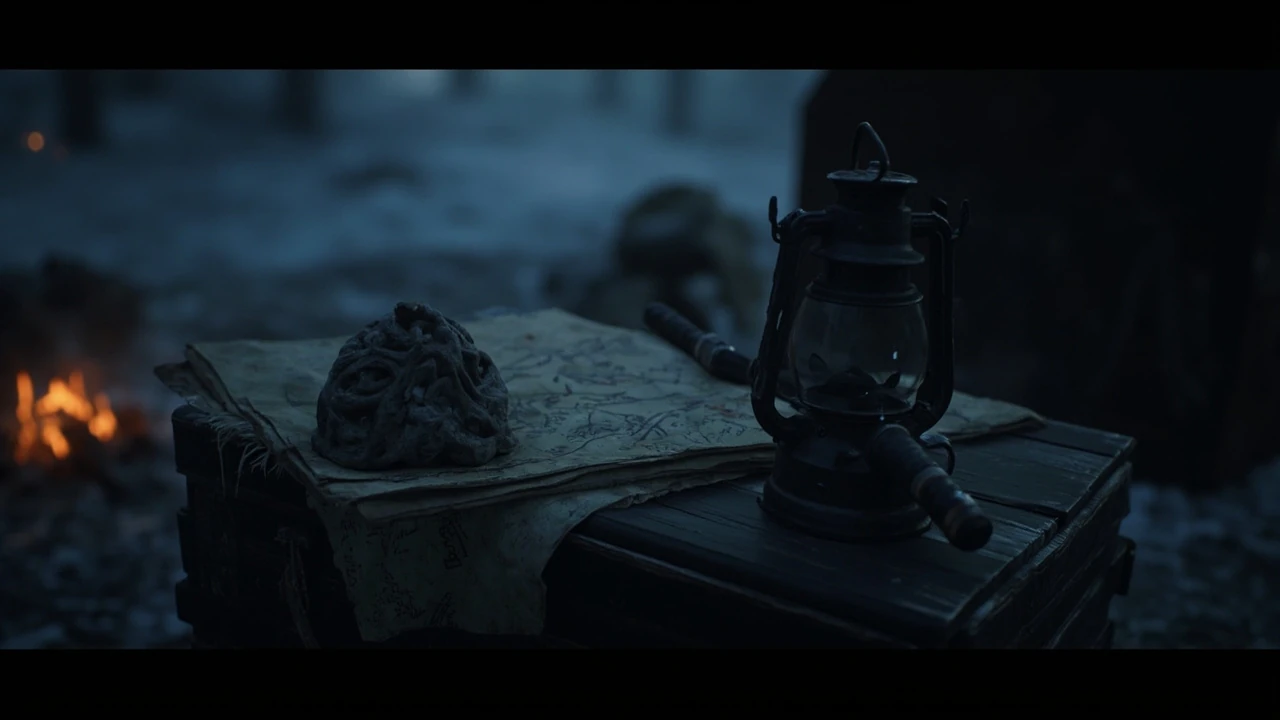
Reliquary of Resilience
The Reliquary of Resilience is a wearable charm in Atsu’s equipment screen in Ghost of Yōtei, Sucker Punch Productions’ open-world follow-up to Ghost of Tsushima. It sits in the accessories slot alongside the other charms unlocked across Ezo. Players tend to pick it up late in a region rather than rush for it, because the effects are subtle and the value shows up across a full play session rather than in any single duel.
Functionally, the charm reduces incoming damage from common enemy types by a flat percentage and adds a small bonus to the resources Atsu recovers from fallen enemies and opened caches. The numbers are tuned so the charm does not trivialise combat on its own. It is not a cheat-death charm, and it does not stack multiplicatively with every other damage reduction source in the game. It lowers the variance of a hard encounter by trimming the worst spikes, and it slightly accelerates the resource recovery that pays for charms, sword kits, and arrow bundles.
This article walks through what the charm does, where it fits in the loadout, how it interacts with the rest of Atsu’s progression, and the situations where it earns its slot. The term gets used loosely in community threads, so the guide starts with a working definition, then moves into mechanics, build placement, and the trade-offs that come with running a defensive charm in a game whose combat still rewards aggression.
What the Reliquary of Resilience actually is
Charms in Ghost of Yōtei are a continuation of the accessory slot introduced in Ghost of Tsushima, but the sequel rebalances the system around the new weapons, the yōkai-infused threats, and a more deliberate stance economy. Some charms are pure stat sticks, some gate specific combat verbs, and a small handful, including the Reliquary of Resilience, blend defense with a secondary effect that touches Atsu’s economy or exploration loop.
The defensive half of the charm applies to ordinary swordsmen, spearmen, and archers. The reduction is small in absolute terms, but it flattens the worst-case swing during a fight where three or four enemies are on screen at once. The economic half applies to the materials Atsu picks up after a fight, which include the resources used to upgrade charms and maintain weapons, and it also applies to a subset of caches found in the open world.
That combination is what makes the charm interesting. Most of the equipment in Ghost of Yōtei asks the player to commit to a single fantasy. Aggressive charms reward constant pressure. Stance charms reward mastery of one weapon family. The Reliquary of Resilience rewards a different approach: it pays off for the player who is willing to take hits, trade a fraction of peak damage, and keep moving through a difficult region without burning through resources.
How the Reliquary of Resilience works in Atsu’s loadout
Charm slots in Ghost of Yōtei are limited, and the loadout system is one of the more discussed changes from Ghost of Tsushima. Players no longer have access to the same broad charm pool at all times. Some charms are gated behind story progression, some behind region completion, and some behind the in-game economy that revolves around the wares sold by specific non-player characters in each region of Ezo.
Slotting the Reliquary of Resilience has three concrete effects during gameplay:
- Damage smoothing against standard enemies. The charm reduces damage from ordinary swordsmen, spearmen, and archers by a small percentage. The reduction is not enough to invalidate the threat, but it flattens the worst-case swing during a fight with three or four enemies on screen.
- Modest bonus to loot recovery. When Atsu loots an enemy or opens certain caches, the resources she picks up are slightly increased. The bonus is small in absolute terms but compounds across a long play session.
- Stability in long engagements. Because both halves of the charm lean toward sustainability, the practical effect is that long fights become slightly more forgiving. A player who can already win a duel does not need the charm. A player who is still learning the encounter does.
The charm does not replace parry timing, stance switching, or weapon mastery. None of its effects change the way the stance system resolves a duel, and none alter the way Atsu’s parry window frames incoming attacks. It layers on top of those mechanics rather than replacing them.
Why Sucker Punch designed the charm this way
The design logic behind the Reliquary of Resilience reads better once you look at what the studio is doing with the sequel overall. Ghost of Tsushima was widely praised for letting players choose their own difficulty curve, partly through the stance system and partly through the way the open world fed them resources. The sequel keeps that philosophy but tightens the screws in a few deliberate places.
Yōkai enemies, which the marketing for Ghost of Yōtei has emphasised, hit harder than their human counterparts, and they tend to appear in ambushes where the player is already mid-combat with a human patrol. The studio needed a way to let players engage with those encounters without forcing a single optimal build path, and the charm system is one of the levers they used.
The Reliquary of Resilience is a small example of a broader design choice: provide a defensive option whose appeal is not “I am unkillable” but “I can keep playing my build through a punishing stretch.” That distinction preserves the core fantasy of the game. Atsu is still a swordswoman in a hostile wilderness, and the game still punishes sloppy play. The charm simply reduces the penalty for the occasional mistake.
Players who have looked at the broader charm pool will recognise this pattern. Several charms combine a small defensive bonus with a secondary effect tied to exploration, loot, or resources. The studio appears to be deliberately building a small subcategory of sustain charms that trade peak combat performance for steadier play, and the Reliquary of Resilience is the clearest example of that category.
How the charm compares with other defensive options
It is worth setting the Reliquary of Resilience next to the other defensive choices the equipment system offers, because the comparison clarifies where the charm earns its slot and where it loses it.
| Charm category | Primary effect | Secondary effect | Best situation | Trade-off |
|---|---|---|---|---|
| Reliquary of Resilience | Flat damage reduction vs standard enemies | Small bonus to loot from enemies and caches | Long sessions in mixed patrol and yōkai regions | Less burst damage than offensive charms |
| Stance-tied charms | Boosts damage and stance pressure for one weapon family | None, or minor parry window change | Duels and boss fights where one weapon dominates | Loses value when the encounter shifts weapons |
| Stealth charms | Reduces detection, improves assassination damage | Sometimes a brief reveal on assassination | Approach-heavy players in open-world regions | Less useful once the player is fully engaged in melee |
| Economy charms | Bonus resources from kills or caches | Sometimes a small defense bonus | Players who want to push upgrades faster | Defensive bonus is usually smaller than dedicated charms |
| Yōkai-specific charms | Damage or resistance against yōkai enemies | Sometimes an effect on specific enemy types | Ambushes and yōkai dens | Lower value against ordinary human patrols |
The trade-off column is the one that matters most. The Reliquary of Resilience is, in raw numbers, weaker than a dedicated defensive charm or a yōkai-specific charm in the exact situation those charms are built for. What it offers is breadth: it is useful in more encounters, against more enemy types, and across longer play sessions. The loot bonus is layered on top to compensate for that. The studio is essentially paying the player in resources to accept a charm that is, in a single fight, less impressive than the alternatives.
When to slot the Reliquary of Resilience
The decision to slot the charm or hold the slot is a real one, and it depends on what the player is trying to do. Three situations cover the bulk of how the charm is actually used in the game.
Open-world roaming in mixed regions
The first situation is the most common. A player is moving through a region that mixes standard patrols, yōkai ambushes, and a steady stream of side activities. Combat in this kind of region is usually short and frequent rather than long and dangerous. The Reliquary of Resilience is a strong fit here because each individual fight is more about staying in the game loop than about winning a single decisive duel. The loot bonus also pays off in this context because the player is opening many caches and looting many bodies in a single session.
Duel and boss encounters
The second situation is the opposite extreme. A player is preparing for a named duel, a legendary enemy, or a specific boss encounter. In this context, the charm is usually the wrong choice. The player wants a stance-tied charm that maximises damage during the small number of openings the encounter offers. The Reliquary of Resilience’s defensive bonus is not large enough to change the outcome of a fight where the real threat is a single, well-telegraphed attack, and the loot bonus is wasted because the player is not clearing a large patrol.
Learning a new region’s enemy mix
The third situation is the one where the charm earns most of its reputation. A player is moving into a region whose enemy mix is unfamiliar. The new region might have more archers, more yōkai, or a different patrol pattern, and the player is still learning the timing. In that case, the Reliquary of Resilience is again a strong fit, because the cost of an early mistake is much higher when the player does not yet know the encounter. The charm’s smoothing effect is most valuable when the player is still calibrating, and it becomes less valuable as the player internalises the encounter.
These three situations are not exhaustive, but they are useful mental categories. The charm is strongest when the player is either exploring broadly or learning, and weakest when the player is about to commit to a single high-stakes duel. That is the rule of thumb the rest of this guide is built on.
How the charm interacts with Atsu’s other progression systems
The Reliquary of Resilience does not exist in isolation. It sits inside a loadout that also includes Atsu’s weapons, her armour, the stance system, and the broader economy of resources that pays for upgrades. The charm’s value shifts depending on how those other systems are configured, and a player who understands the interactions can squeeze more out of the slot than a player who treats the charm as a generic defensive pick.
Interaction with armour
Armour in Ghost of Yōtei continues to provide the largest source of flat damage reduction. The Reliquary of Resilience is layered on top of that reduction, and the way the two interact is worth understanding. Because both sources of defence are percentage-based, stacking them raises the player’s effective hit points, but the chance of a one-shot kill from a heavy attack does not disappear. The charm complements good armour rather than substituting for it.
Interaction with the stance system
The stance system is the core combat loop in the game, and the Reliquary of Resilience does not interact with it directly. What it does is buy the player a slightly larger margin of error while they work through a stance, which is most useful in long fights where the player has to switch stances multiple times. The charm’s value here is psychological as much as mechanical. A player who is not worried about taking a single extra hit is more willing to commit to a stance switch, which often leads to cleaner combat overall.
Interaction with the resource economy
The loot bonus attached to the charm is small, but it does compound. A player who runs the charm during a long play session will accumulate noticeably more resources by the end of the session than a player who runs a pure offence charm. That is the second half of the charm’s value proposition: it pays for itself in upgrades over time, and those upgrades then make the rest of the loadout stronger. The charm is, in a real sense, an investment.
These interactions can be summarised in a short table, because they affect different parts of the loadout in different ways.
| System | Direct interaction with the charm | Practical effect on gameplay |
|---|---|---|
| Armour | Layered with armour’s flat damage reduction | Higher effective hit points, but heavy attacks still dangerous |
| Stance system | No direct effect on stances | Larger margin for stance switching in long fights |
| Resource economy | Small bonus to loot from enemies and caches | Faster accumulation of upgrade materials over a long session |
| Weapon upgrades | No direct effect on weapon damage | Indirect: loot bonus funds upgrades that boost damage |
| Exploration systems | Loot bonus applies to some exploration rewards | Slightly faster progress through side content |
The table is the cleanest way to read the charm’s role in the broader loadout. It does not dominate any single system, and it is not the best pick in any single system. It is the only charm in the slot list that touches several systems at once, and that breadth is the reason it has a stable niche in the equipment screen.
Common mistakes when using the charm
Because the Reliquary of Resilience is a smoothing tool rather than a peak-damage tool, it is easy to misuse. A few mistakes come up often enough that they are worth calling out explicitly, because they distort how the charm feels in play and how it compares with the alternatives.
- Slotting it as a crutch in a duel. A player who is about to fight a named enemy and slots the charm because “defence is good” is usually making a mistake. The duel rewards burst damage, and the charm’s defensive bonus is not large enough to offset the loss of a stance-tied charm’s offensive bonus. The result is a longer, less decisive fight.
- Ignoring the loot bonus. A player who runs the charm and never picks up resources is leaving a meaningful part of its value on the ground. The defensive bonus is modest, and the loot bonus is what makes the slot pay for itself over a long session. Skipping loot is, in effect, running only half the charm.
- Stacking it with other economy charms. A player who slots the Reliquary of Resilience alongside a dedicated economy charm is paying two charm slots for two sources of the same effect. The marginal return on the second economy charm is much smaller than the return on a stance or stealth charm would be, and the player ends up with a loadout that is soft in exactly the places the game punishes softness.
None of these mistakes will ruin a run, but they are the difference between a charm that feels quietly powerful and one that feels like a wasted slot. The Reliquary of Resilience rewards the player who treats it as a long-session tool, not as a panic button.
How the charm compares with a typical best-charms list
Many community guides for Ghost of Yōtei cluster charms into best-in-slot lists by category. The Reliquary of Resilience usually lands in the second tier of those lists, behind stance-tied charms and ahead of economy-only charms. That placement is roughly right, but the reason the charm lands in the second tier is more specific than the lists usually explain.
The charm is not a damage source. It does not change the way stances resolve, and it does not change the way parries work. That alone keeps it out of the first tier. What the lists underweight is the fact that the charm’s combination of defence and economy is unique within the equipment pool. A player who replaces it with a stance charm loses the loot bonus. A player who replaces it with an economy charm loses the defensive smoothing. The Reliquary of Resilience is the only charm in the pool that does both, and that is the reason it has a stable place in the second tier rather than dropping out of the meta entirely.
For players who care about the design of the game rather than only the meta, that is the more interesting reading. The studio deliberately built a charm that is not the best at any one thing, and they made sure that the combination of effects could not be replicated by combining two other charms. That is a real design choice, and it is the kind of choice that becomes clearer when a charm is examined on its own terms rather than measured against a single-number ranking.
When the Reliquary of Resilience is the wrong choice
It is worth being direct about the cases where the charm should not be slotted, because the cases are concrete and a player who ignores them will feel the loss during a session.
- Late-game duels and legendary enemies. These fights are tuned around burst damage and clean stance execution. The charm’s defensive bonus is too small to change the outcome, and the loot bonus is irrelevant. A stance-tied charm or a weapon-specific charm is the right slot here.
- Pure stealth runs. A player who is clearing a region without engaging in melee is wasting the defensive half of the charm. A stealth charm is a better slot, because it interacts directly with the verbs the player is using.
- Speedrun-style open-world clears. A player who is moving quickly through a region and only engaging in combat when forced to is overpaying for the charm’s defensive half. The loot bonus is real but small, and the defensive bonus rarely fires. A pure economy charm is a better fit.
These cases are not a complete list, but they cover the most common misuses. The Reliquary of Resilience is a charm for long, varied play, and it loses value when the play style narrows.
How the charm fits into a longer playthrough
The Reliquary of Resilience has a more interesting role in a longer playthrough than it does in a single session. The charm’s two effects compound across a long campaign. The defensive bonus reduces the cost of each mistake, and the loot bonus accelerates the rate at which the player accumulates upgrade materials. The two effects together mean that a player who runs the charm for a long stretch ends up with a slightly more developed loadout than a player who runs a peak-damage charm for the same stretch.
That is a deliberate design choice by Sucker Punch, and it is consistent with how the studio has approached progression in the series. Ghost of Tsushima rewarded patient players with a steady stream of resources, and the sequel does the same. The Reliquary of Resilience is one of the more explicit tools the studio has given players to opt into that style of play. The charm is, in effect, a small subsidy for the patient player.
For players who are planning a long playthrough, the practical advice is to slot the charm during the early parts of each new region, when the player is still learning the local enemy mix, and to swap it out for a more specialised charm once the region is familiar. That pattern uses the charm’s strengths and avoids its weaknesses, and it is a reasonable default that can be adjusted based on the player’s preferred build.
What the charm tells us about the game’s design priorities
The Reliquary of Resilience is a small piece of equipment, but it is a useful lens on the studio’s broader design priorities.
First, the studio wants the player to be able to choose between offence and sustainability. The charm is one of the clearest expressions of that choice in the equipment pool, and it is a deliberate alternative to a build style that maximises damage. A player who picks the Reliquary of Resilience is, in a real sense, telling the game that they would rather play longer fights with fewer spikes than shorter fights with more spikes.
Second, the studio wants the game’s economy to be visible in combat. The loot bonus attached to the charm is a small but persistent reminder that every fight feeds the next upgrade. That is consistent with the broader design of the game, which uses exploration rewards to nudge the player through side content without forcing it.
Third, the studio wants the equipment system to reward reading the encounter. The Reliquary of Resilience is the right pick in some fights and the wrong pick in others, and the game does not tell the player which is which. The player has to read the situation, decide what kind of fight is coming, and slot the charm accordingly. That is a small but real skill expression, and it is one of the ways the equipment system keeps the late game interesting.
How to think about the charm in build discussions
Build discussions for Ghost of Yōtei often focus on the stance system and the weapon upgrades, because those are the systems that produce the largest single-fight performance numbers. The Reliquary of Resilience is rarely the headline of those discussions, and that is appropriate. The charm is not a headline. It is a slot that supports a build, and the value of that support is felt over a session rather than in a single duel.
Players who want to integrate the charm into a build discussion should treat it as a long-session modifier. The right question to ask is not “does this charm win me this duel” but “does this charm keep me playing my build for the next two hours.” If the answer is yes, the charm earns its slot. If the answer is no, the slot is better used for a more specialised charm. That framing is closer to how the studio appears to have tuned the charm, and it tends to produce better loadout decisions than chasing single-fight numbers.
Frequently asked questions
What does the Reliquary of Resilience do in Ghost of Yotei?
The Reliquary of Resilience is a charm that reduces incoming damage from standard enemies by a small percentage and grants a modest bonus to the resources Atsu recovers from enemies and caches. It is a smoothing tool rather than a damage source, and it is most useful during long, varied play sessions.
Is the Reliquary of Resilience a good charm?
It is a good charm in the situations it is built for, and a mediocre charm outside of them. It is a strong pick during open-world roaming and while learning a new region, and a weak pick for duels and boss fights. The charm is not a best-in-slot pick, but it has a stable niche in the equipment pool because no other charm combines its defensive and economic effects.
When should I slot the Reliquary of Resilience?
Slot it when you are exploring a region with mixed patrols, when you are learning a new region’s enemy mix, or when you are planning a long play session. Avoid slotting it for duels, boss fights, pure stealth runs, or speedrun-style clears, where more specialised charms will outperform it.
Does the Reliquary of Resilience stack with armour?
Yes, the charm’s defensive bonus is layered on top of the armour’s damage reduction. The two effects do not stack multiplicatively, and heavy attacks from yōkai enemies can still be dangerous even with both equipped. The charm complements good armour rather than replacing it.
Does the Reliquary of Resilience affect the stance system?
No, the charm does not change the way stances resolve or the way parries work. Its value is that it gives the player a slightly larger margin of error while they work through a stance, which is most useful in long fights where the player has to switch stances multiple times.
Is the loot bonus from the Reliquary of Resilience worth it?
The bonus is small in absolute terms, but it compounds across a long play session. A player who runs the charm during a two-hour session will accumulate noticeably more resources than a player who runs a pure offence charm for the same stretch. The loot bonus is also one of the reasons the charm has a stable niche: no other charm in the slot list combines defence with a meaningful economic effect.
Should I use the Reliquary of Resilience for duels?
Usually no. Duels and boss fights reward burst damage and clean stance execution, and a stance-tied charm or a weapon-specific charm will outperform the Reliquary of Resilience in that context. The charm’s defensive bonus is not large enough to change the outcome of a single decisive fight, and its loot bonus is wasted when the player is not clearing a large patrol.
How does the Reliquary of Resilience compare with other defensive charms?
Compared with dedicated defensive charms, the Reliquary of Resilience is broader but weaker in any single situation. Its unique feature is the combination of defence and loot, which no other charm in the pool offers. A player who values that combination will prefer it; a player who values peak defensive performance in a specific encounter will not.
Does the Reliquary of Resilience help against yokai enemies?
The charm’s defensive bonus applies to standard enemies, and its effect against yōkai enemies is more limited. A dedicated yōkai charm is a better pick when the player is moving through a region with frequent yōkai ambushes. The Reliquary of Resilience is best understood as a charm for mixed regions rather than for yōkai-heavy ones.
Is the Reliquary of Resilience worth a charm slot in the late game?
In the late game, the charm is still a useful pick during exploration and during the first few encounters in a new region. It becomes less useful as the player’s build specialises and as duels become the dominant combat form. The right approach in the late game is to swap the charm in and out based on the encounter, rather than committing to it as a permanent slot.




1 Comment
[…] having follow you around. If you are working through other single player games at the moment, our Ghost of Yotei charm guide covers a similar sort of decision from a very different […]
Your comment is awaiting moderation.
This was beautiful Admin. Thank you for your reflections.