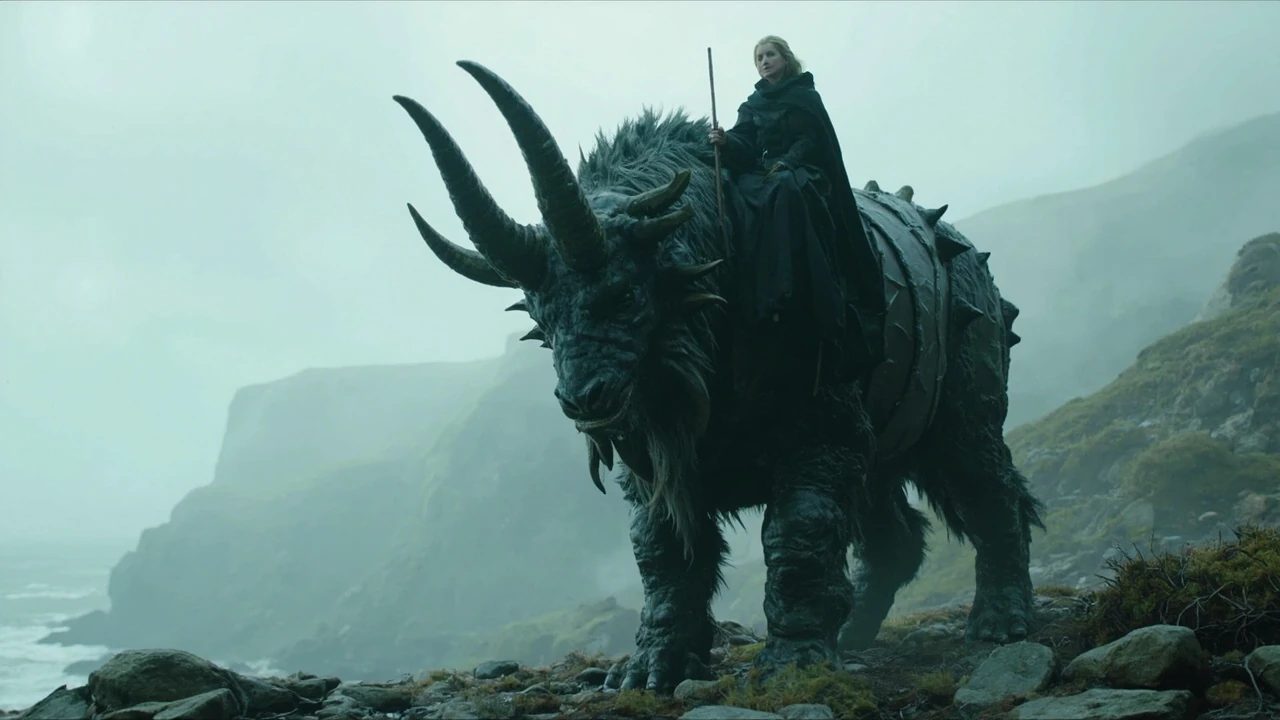
A Graphorn is the largest mountable beast in Hogwarts Legacy, and the only one that doubles as a heavy combat platform. This guide covers where to find a Graphorn, how to unlock the ability to ride one, what it actually does in combat, how breeding works once you own a pair, and the practical limits that the developers built into the system. It is written for players who already have a save somewhere past the early game and want to finish the “San Bakar’s Trial” chain, complete the mountain-side beast side content, and decide whether the time investment is worth the payoff.
Graphorn in Hogwarts Legacy: what the creature is and why it matters
Graphorn in Hogwarts Legacy is a hulking, mountain-dwelling magical beast with thick, rock-like hide and two heavy horns curving forward from the brow. It is modelled as a unique mount category that no other creature in the game shares: it can carry the player, swim, charge through enemies, and serve as a mobile damage source. The design intent appears to be a reward for finishing a specific late-game quest line, rather than an early-game travel upgrade. Players usually encounter their first Graphorn in the southern half of the map, in the area around the Marunweem Lake and Cragcroft Shore region, while the quest that unlocks riding and breeding them sits further south in the Poidsear Coast and the cliff system that borders it.
The Graphorn is also the mount tied to the “Lord of the Shore” achievement, which requires a specific set of beats: locate the creature, complete the related quest, mount the beast, and then return to a specified NPC. That achievement forces players to learn the Graphorn system even if they were planning to ignore the beast mechanics. The Graphorn is therefore less of an optional mount and more of a structured late-game reward that the quest designer uses to gate a small set of abilities, a small set of cosmetic items, and a single trophy-style milestone.
For most players the practical questions are: where do I find a Graphorn, what quest unlocks the ability to ride it, can I breed a second one, what does the Graphorn actually do in combat, and is the grind for the upgrades worth it. The remainder of this guide answers each of those in order, with the in-game steps, the time cost, and the trade-offs you should expect. There are no shortcuts through the riding quest, no bonus from a higher level, and no bonus gear that lets the player ride a wild Graphorn before the trial is finished.
Where to find a Graphorn in Hogwarts Legacy
Wild Graphorns roam the cliffs and the shoreline in the southern part of the open world. They are not random spawns. The game places them in fixed encounter zones, which means the path to a Graphorn is the same on every playthrough, but the path through the terrain around them is the part that varies by player choice. The southern region is also the area with the most vertical terrain in the game, which is part of why the mount is gated behind a story quest rather than handed out as a free travel upgrade.
The most reliable encounter points are:
- A small valley just south of the Marunweem Ruins fast-travel point, where a single adult Graphorn patrols between two rock formations.
- The coastline east of Cragcroft, where a second adult patrols the upper cliff band above the water.
- A highland plateau along the southern edge of the Poidsear Coast, which is the encounter area tied to the related quest.
- An optional den near the cliff that overlooks the sea, where a Graphorn rests during a thunderstorm and is easier to approach on foot.
Each location has a common pattern: the Graphorn is marked by a large, multi-stage beast icon on the map once you are close enough, and the animal can be seen from a distance if the in-game time of day is set to late morning or earlier. The encounter works like other beast captures in the game: approach carefully, use the same Nab-Sack mechanic that you would use for a Mooncalf or a Niffler, and then interact with the den if you want to harvest materials. The den stays on the map after a successful capture, which means the player can come back to the same point later to use it as a fast mounting point rather than having to walk across the entire southern region to find a fresh Graphorn.
Do not expect the Graphorn to behave like a Puffskein. It is aggressive when you get too close without preparation. A standard capture attempt against a wild adult has two failure modes: the Graphorn charges you, or it runs toward the cliff edge and falls into a water zone where the capture animation fails. Both of these are recoverable, but they cost time. The simple solution is to dismount, slow your walk, and approach from the side rather than the front. The Graphorn’s charge telegraph is a two-second wind-up with the head pulling back, and the dodge window is wide if you keep your distance. A standard pet spell from the player’s wand also opens a short stagger window, which is enough time to land the capture in most cases.
There is a secondary failure mode that only shows up on the southern Poidsear cliffs. If the player approaches the Graphorn from the seaward side, the beast will often run toward the cliff rather than toward the player, and the capture fails as the Graphorn drops into the water below. The reliable path is always to come from inland, where the slope gives the player more room to back up if the charge starts. The same advice applies during thunderstorms at the optional den, since the rain reduces visibility and the Graphorn’s audio telegraph is harder to hear.
How to unlock the Graphorn riding quest
Riding a Graphorn is not unlocked the moment you capture one. It is unlocked by a quest called “San Bakar’s Trial,” which sits late in the main story and is one of the last trials before the final act of Hogwarts Legacy. The trial is delivered by the Headmaster portrait and is the Graphorn’s story hook: the narrative explains that a Graphorn mount is required to climb and fight in a specific southern region that the player has not yet been able to reach on foot. The quest is also the entry point for the rest of the late-game beast content, since the same trial exposes the mountain vivarium and the breeding pad recipe.
The unlock flow is:
- Reach the main-story threshold that opens the southern mountain region. This is tied to story progression, not to player level.
- Speak to the Headmaster portrait in the reception room to accept “San Bakar’s Trial.”
- Travel to the indicated encounter area along the Poidsear Coast and locate the marked Graphorn.
- Complete the capture and any required combat that the quest adds on top of the standard beast encounter.
- Return to the portrait to confirm the unlock and receive the Graphorn mount ability.
From that point, any Graphorn den that the player has previously visited will show a “Mount” option instead of the standard capture option. The mount option is permanent on the save file, and it carries across fast travel, broom flight, and swimming. There is no extra side quest to keep the ability active, and there is no reputation gate. The player does not have to keep the original wild Graphorn in the vivarium to keep the mount, either; the riding ability is tied to the player, not to a specific animal.
Players who have already finished the main story can still access the Graphorn. The encounter zones remain populated, the dens remain interactable, and the mount option remains available. The only thing the late main-story timing controls is the order in which the ability appears in your log. If the player is doing a fresh save and wants the Graphorn early, the best route is to push the main story until the trial unlocks, then backtrack to the southern dens rather than running the beast side content first.
How to ride a Graphorn: controls, speed, and the things that surprise players
Graphorn riding is mapped to the same input layer as other land mounts. The mount key calls the animal, the dismount key releases it, and the camera switches to a third-person follow shot that is slightly higher than the broom camera to keep the beast’s head and horns in frame. The base controls are:
| Input | Action | Notes |
|---|---|---|
| Mount key on land | Call and mount the Graphorn from a nearby den | Requires the riding ability from San Bakar’s Trial. |
| Movement keys | Walk, trot, and a slower heavy gallop | There is no sprint state comparable to the Hippogriff; the Graphorn is built for power, not pure speed. |
| Jump | Single heavy jump, lower arc than the Hippogriff | Useful for low obstacles, not for clearing tall walls. |
| Swim | Wade and paddle through shallow and mid-depth water | The Graphorn is the only land mount that can also function in water without the player dismounting. |
| Charge attack | Forward charge with a short cooldown | This is the combat input and is described in the next section. |
| Dismount | Drop off the mount and return it to its den | Fast travel after dismount teleports the mount automatically. |
There are three behaviours that players regularly misread on a first run. The first is that the Graphorn is slower than the Hippogriff on open ground. It is. The second is that the Graphorn cannot take a broom-route shortcut. It cannot. The third is that the Graphorn does not respond to the same whistle key as the Hippogriff; it responds to a generic mount call, which is the same key the player uses for other large land beasts. Players who try to summon a Graphorn with the Hippogriff whistle will only ever call a Hippogriff. The mount call is also subject to a small range limit, and the player has to be on the ground rather than in the air for the call to register.
The Graphorn’s practical role is therefore closer to a slow, heavy vehicle than a fast travel mount. It is the mount you take when you know you will fight before you reach your destination, or when you need to cross a shallow lake without dismounting. For long, peaceful distances the broom or the Hippogriff is still the better choice. The Graphorn also handles a small amount of vertical terrain: it can clear a low fence, push through a band of brush, and bump its way up a shallow slope, but it cannot reach a high ledge the way the Thestral can. The standard rule is that any climb the player can do on foot, the Graphorn can also do, and any climb that requires a flying mount, the Graphorn cannot.
Graphorn combat: what the charge does, what it does not, and when to use it
The Graphorn is the only mount in Hogwarts Legacy that has its own damage input, and that input is the main reason players bother with the quest at all. The charge attack is a short-range forward slam that scales off the same basic damage stat that drives the player’s wand, and it is treated as a separate hit for purposes of status effects and combo timers. The charge also has a brief invulnerability frame on the player, which is the part that makes the attack useful as an opener against duel-style enemies rather than only as a damage tool.
| Combat scenario | Graphorn charge effectiveness | Recommended action |
|---|---|---|
| Single heavy enemy, no shield | High | Charge twice, dismount for the finisher. |
| Group of four to six weak enemies | High | Charge through, then use area spells from the saddle. |
| Group with a shielded enemy at the back | Medium | Charge the front line, dismount, break the shield, remount. |
| Flying enemy or long-range caster | Low | Dismount and use ranged spells; the charge is wasted. |
| Dark Wizard duel in the open world | Medium | Open with a charge to break the duel invulnerability, then close with combos. |
| Spider or Inferius swarm in a dungeon | Low | Dismount immediately; the Graphorn is too large for narrow corridors. |
The charge has a short cooldown and a clear tell, and a knowledgeable enemy will sidestep it if you charge straight on. The technique is to angle the charge so the Graphorn hits the enemy from the side, or to dismount, bait a swing, and then remount and charge from a different angle. The mount is also a valid target for enemies, which means the player can use the Graphorn as a temporary shield for one or two hits before the damage becomes unrecoverable. There is no explicit health bar for the mount, but a sustained fight will knock the player off and force a remount. A second charge into a group of four to six enemies is usually enough to clear the encounter, provided the player follows up with a basic cast before the cooldown expires.
The charge is not a substitute for your spell kit. It is a setup tool. The standard pattern for difficult open-world encounters is to open with a charge, switch to your highest-damage spell while the enemy is staggered, and then remount only if a second charge is the cleanest way to finish the fight. For tight, indoor, or platforming encounters, the Graphorn is a liability and should be left at the nearest den. The same applies to boss fights in the main story: the boss arena is usually too small for the Graphorn’s hit volume, and the charge will trade damage with the boss rather than break its attack chain. The charge is a southern-map tool, not a general-purpose damage boost.
Players who want to squeeze more out of the charge should pair it with a few specific spell upgrades. A well-timed Levioso or Arresto Momentum on a shielded enemy opens a longer stagger window, which lets the player land two charges instead of one. The Crucio and Imperio curses are less effective from the saddle because their cast time is longer than the charge cooldown. The simplest upgrade path is to focus on basic casts and the Protego spell rather than the curse line, since the charge already provides the heavy hit.
Graphorn breeding, ownership, and the second-slot question
Once the player has captured a Graphorn and finished the riding unlock, the breeding system opens up. The breeding flow is a small side activity that lives inside the Room of Requirement, in the same vivarium system that handles the other magical beasts. The breeding pad is a specific furniture item that the player can place in a vivarium and then use to combine a male and female of the same species. The mountain vivarium is the only vivarium that accepts a Graphorn pair, which is also the same vivarium where the wild capture is stored, so the player does not have to build a second enclosure just to start breeding.
The breeding rules are the same as the other beasts in the game, with one important addition tied to the Graphorn specifically:
- A pair of adult Graphorns can be placed in the same vivarium to produce a single offspring.
- The offspring inherits the same base stats as the parents; there is no stat variation across offspring in Hogwarts Legacy.
- The offspring can be released, harvested, or kept as a second adult in the vivarium.
- Only one of the two parents needs to be the original wild Graphorn; the second can be the offspring once it grows up.
The practical reason to breed a second Graphorn is the “Lord of the Shore” achievement and the related trophy set. The achievement requires that the player own a pair of Graphorns and have visited a Graphorn den on foot. Players who only ever capture one and ride it will not unlock the achievement, and there is no shortcut through a single Graphorn for the trophy condition. The breeding is therefore a small but real part of the late-game completion loop. The breeding pad also serves as a long-term storage option, since the player can keep a pair in the vivarium as a passive source of fur without having to re-harvest the same animal every time.
There is a recurring player question about whether breeding a Graphorn produces a better mount. It does not. The Graphorn does not have a tier system, and the offspring is mechanically identical to the parent. The only benefit of the second Graphorn is the achievement and the satisfaction of having a second adult in the vivarium. There is also no colour or pattern variation in the offspring: the breed produces the same grey hide and the same horn shape as the parents, which is different from the way some of the smaller beasts vary in the same system. The vivarium also does not scale the Graphorn’s size with age, so the offspring looks the same as the adult once it finishes the growth cycle.
Graphorn materials, upgrades, and what the creature contributes to the rest of the game
Graphorn materials are a small but useful part of the game’s crafting system. The Graphorn drops two categories of resource when the player interacts with the den, harvests the beast, or completes a vivarium cycle. The drop table is short on purpose, since the Graphorn is a late-game creature and the developers did not want to extend the resource grind past the southern map. The full list of useful materials is below.
| Material | Source | Primary use |
|---|---|---|
| Graphorn Horn | Harvesting a wild or owned Graphorn | Required for the highest-tier wand upgrade at a specific bench. |
| Graphorn Hide | Den interaction after a successful mount or capture | Required for a small set of high-tier gear recipes in the Room of Requirement. |
| Graphorn Fur | Vivarium cycle on a paired adult | Used in a small number of cosmetic upgrades and one trait potion recipe. |
| Graphorn Offspring (single) | Breeding result | Can be kept, released, or harvested once for a single trade-in resource bundle. |
For most players the Graphorn Horn is the only material that genuinely matters, because it sits behind the single highest-tier wand upgrade in the crafting system. The hide and fur are useful only if the player is doing a full completionist run and wants every recipe in the crafting log. The offspring is optional, and there is no achievement for harvesting it, which is a useful piece of information for players who are uneasy about the choice. The offspring trade-in is also a one-time resource, not a repeatable drop, so the player cannot lean on it as a long-term material source.
The upgrade chain is short. The player needs one Graphorn Horn for the first wand tier, two for the second, and a small number of standard upgrade resources that the rest of the game already provides. The total demand is low enough that a single breeding cycle plus a single harvest covers every recipe the game ties to the Graphorn. There is no long grind here, and there is no hidden resource that requires the player to repeat the encounter zone multiple times. The trade-off is that the Graphorn’s materials are also used in a small set of cosmetic upgrades that the player has to find by exploring the Room of Requirement, so the recipes are spread across the crafting log rather than sitting on a single bench.
The trait potion recipe that uses Graphorn Fur is worth a specific note. The potion applies a passive stat boost to the player’s gear, and the recipe is the only one in the game that uses a Graphorn material as the primary ingredient. The recipe is gated behind the breeding pad, so the player has to breed at least one pair of Graphorns before the recipe becomes available. The potion itself is repeatable, but the ingredient cost is high enough that the player is unlikely to spam it across a full gear set.
Graphorn vs other Hogwarts Legacy mounts: when to pick which
Mount choice in Hogwarts Legacy is a small optimization, not a build choice, but the differences are real enough to be worth a direct comparison. The four options the player can call from a den are the Hippogriff, the Thestral, the Graphorn, and the ground-only mounts. The broom is a separate category and is not part of this comparison, since the broom is the universal fast-travel tool and is useful in every region of the map.
| Mount | Top speed | Combat role | Water handling | Vertical reach |
|---|---|---|---|---|
| Graphorn | Medium | High (charge attack, stagger) | Wades and swims without dismount | Low; cannot reach high ledges |
| Hippogriff | High | None; the player uses standard spells | Cannot enter water without dismount | High; can clear most ledges with the glide |
| Thestral | High | None; the player uses standard spells | Cannot enter water without dismount | Highest; can clear the tallest cliffs |
| Ground mounts | Low to medium | None | Cannot enter water without dismount | None |
The decision rule is simple. If the player is heading into an open-world fight, the Graphorn is the better call. If the player is heading up a tall cliff or across a long, empty field, the Thestral or the Hippogriff is the better call. If the player needs to cross a lake and fight at the far shore, the Graphorn is the better call. If the player is exploring a dungeon, none of the large mounts are usable, and the broom is the right call for traversal back to the entrance. The broom is also the only mount that the player can summon from any location, including inside Hogwarts, which keeps it useful in regions where the Graphorn cannot be called.
The Graphorn is not a replacement for the broom. It is a slow, heavy, water-capable combat mount that earns its place on the southern map, where the cliffs meet the sea, and where the encounters that the quest designer placed for the late game are tuned to the mount’s pace. On the northern half of the map, the player will not use the Graphorn often, because there is little water and few large-group encounters in that area. The same is true in the Hogwarts valley itself, where the broom and the Floo network handle most of the player’s travel needs. The Graphorn is, in practice, a regional mount: it shines on the southern coast, and it is a small liability everywhere else.
Common Graphorn problems and how to solve them
The Graphorn system has a small set of recurring failure modes. The list below is ordered from the most common player issue to the least common, with the practical fix for each. None of the items on the list are save-breaking bugs; they are all state-machine problems in the player’s quest log, the vivarium loadout, or the combat rules, and the fix in every case is to check the prerequisite rather than to reload the save file.
- The Graphorn will not mount after capture. The riding quest must be finished. Capturing a Graphorn before “San Bakar’s Trial” places the creature in the vivarium but does not unlock the mount option on the wild dens.
- The Graphorn keeps falling off the cliff during the capture. The player should approach from the inland side and let the beast move toward the player. The capture is more reliable on flat ground than on a slope.
- The Graphorn is not appearing in the vivarium. The vivarium must be the appropriate one for Graphorns. The game restricts certain beasts to specific vivarium biomes, and the Graphorn is restricted to the mountain vivarium. The same vivarium must be active when the beast is placed.
- The breeding pad is missing from the Room of Requirement. The breeding pad is a craftable furniture item, not a default fixture. The recipe is unlocked after the riding quest and is placed through the vivarium’s crafting menu.
- The “Lord of the Shore” achievement is not unlocking. The achievement requires a pair of adult Graphorns in the vivarium, the riding quest to be complete, and a visit to a specific den on foot. If any of those three conditions is missing, the achievement will not trigger.
- The Graphorn charge does not stagger an enemy. The enemy is in a story-protected state, the enemy is shielded, or the player is too far from the impact point. The charge is a short-range, short-cooldown ability, not a long-range stagger.
- The Graphorn is not responding to the mount key. The player is in the air, the player is too far from a den, or the player is inside a region where the Graphorn is disabled. The mount call only works on the ground and within a small range of an active den.
- The Graphorn is too slow for the player’s planned route. The player is heading across a long, empty field rather than into a fight. Switch to the Hippogriff or the broom for the open traversal, and switch back to the Graphorn at the encounter zone.
The most common error on a first playthrough is the assumption that capturing a Graphorn is enough to unlock riding. It is not, and the fix is to push the main story until the trial unlocks, not to keep capturing fresh Graphorns. The second most common error is placing the Graphorn in the wrong vivarium. The mountain vivarium is the only one that holds a Graphorn, and the game will silently reject the placement if the player tries to use a different biome. The third most common error is charging a shielded enemy from the front. The shield blocks the charge, and the player loses the cooldown window for nothing.
Players who hit a wall on the “Lord of the Shore” achievement usually discover that one of the three conditions is missing, not that the achievement is broken. The most frequent culprit is a missing den visit. The player has the pair in the vivarium and has finished the quest, but never walked up to the den on foot after the riding quest completed. The fix is to fast travel to the closest den and walk into the trigger area. The achievement then triggers on the next quest log update.
Frequently asked questions
Where is the first Graphorn in Hogwarts Legacy?
The first Graphorn is in the southern open-world region, usually along the cliffs near Marunweem or the Poidsear Coast. The beast is a fixed encounter, not a random spawn, and it is marked on the map once the player is close enough. Players who finish “San Bakar’s Trial” will be guided directly to the closest adult.
Do I need to finish the main story to ride a Graphorn?
You do not need to finish the entire main story. You do need to reach the “San Bakar’s Trial” quest, which is one of the late-game trials and is unlocked through the main-story progression system, not through player level alone. Once that quest is complete, riding is permanent on the save file.
Can you breed a Graphorn in Hogwarts Legacy?
Yes. Once the riding quest is complete, the player can place a male and a female Graphorn in the mountain vivarium and use the breeding pad. The offspring is a single animal and inherits the same base stats as the parents. There is no stat variation across offspring, and the offspring is not a tier above the parent.
What does the Graphorn do in combat?
The Graphorn has a forward charge attack that deals heavy damage, staggers most standard enemies, and acts as a separate hit for combo and status effect purposes. The charge is the main reason to bring the mount into an open-world fight. The Graphorn does not have ranged attacks, and the player still uses their wand for the bulk of the damage.
Is the Graphorn faster than the Hippogriff?
No. The Graphorn is slower on open ground than the Hippogriff or the Thestral. Its advantage is the combat charge and the ability to enter water without dismounting. For pure travel, the Hippogriff or the Thestral is the faster choice.
Do Graphorn materials matter for crafting?
Yes, but only a small number of recipes use them. The Graphorn Horn is the only material that gates a real upgrade, and it sits behind the highest-tier wand upgrade. The hide and fur are used in a small set of high-tier gear recipes and one trait potion. A single breeding cycle plus a single harvest is enough for the full set of recipes the game ties to the Graphorn.
Why is my Graphorn not mounting when I press the key?
The riding ability is gated by the quest, not by the capture. The player must complete “San Bakar’s Trial” before the mount option appears on a wild den. The capture alone places the Graphorn in the vivarium but does not unlock riding.
How many Graphorns do I need for the “Lord of the Shore” achievement?
You need a pair. The achievement requires two adult Graphorns in the same vivarium, the riding quest to be complete, and a visit to a specific den on foot. A single captured Graphorn is not enough.
Can the Graphorn swim?
Yes. The Graphorn is the only land mount in the game that can wade and paddle through mid-depth water without the player dismounting. The ability is part of the base mount and is unlocked at the same time as the riding quest.
Is the Graphorn worth the time investment?
For a completionist run, yes. The mount is required for one achievement, it provides a useful combat input for the southern open-world encounters, and it gates one of the highest-tier wand upgrades. For a player who only wants to finish the main story, the Graphorn is optional. The main story can be completed without ever capturing or riding one.
The Graphorn sits in a wider context inside the game’s beast and mount systems, and the southern Poidsear region is the part of the open world where it pays for itself. For the wider lore, the studio context, and the development background behind the title, the Hogwarts Legacy entry on Wikipedia is the standard reference page, and the wider announcement-period coverage of the project, including the public conversation around the studio’s relationship with the original author, is documented in a Verge report on Warner Bros.’s statement about the game’s creative direction, which provides useful background for this point. Players who want to compare the Graphorn with the rest of the mount roster can also check the site’s Hippogriff-focused quest write-up and the broader game-direction piece linked in the related reading below, since both cover parts of the design context that this guide does not repeat.