RE9 safe codes: every combination and how to solve each lock
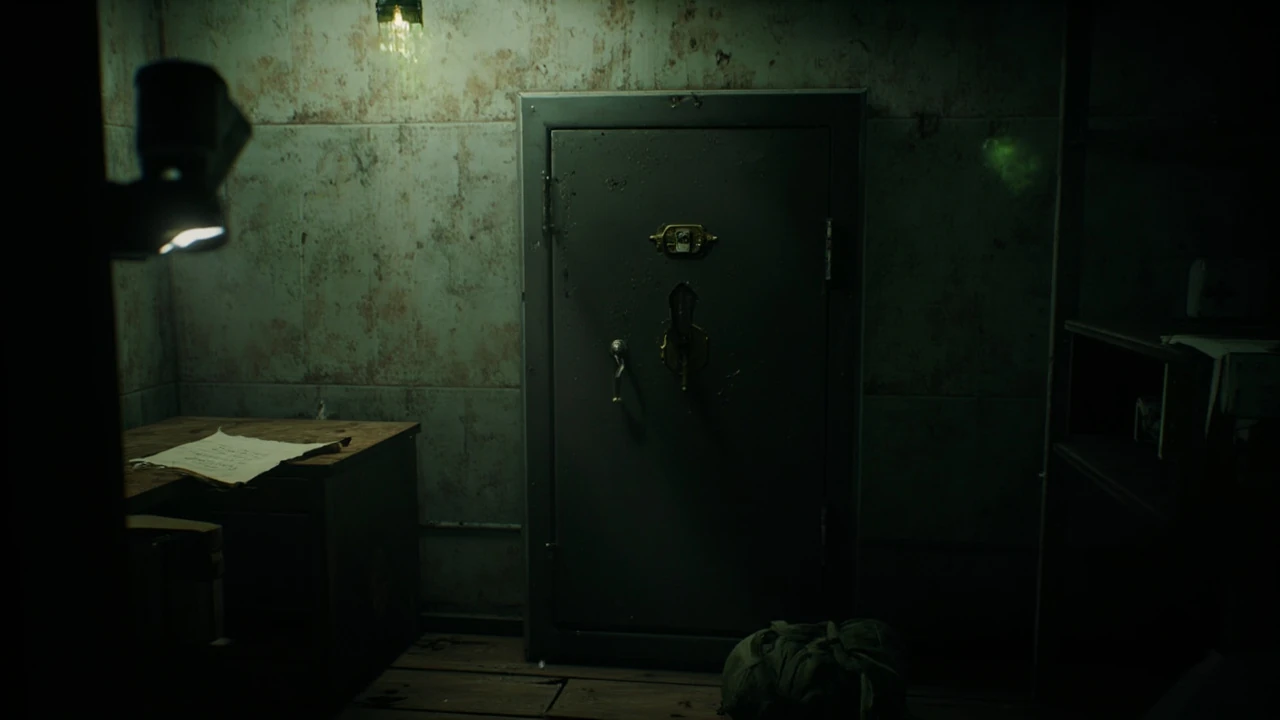
A locked safe in Resident Evil Requiem is rarely the end of a puzzle. The combination almost always sits in the same environment, and the lock itself is built so that a wrong dial only resets after a brief animation, not a full game-over. That small forgiveness turns safe codes into a skill that compounds across a single playthrough: once you learn where the designers like to hide clue documents, every later safe becomes a faster detour rather than a brick wall. The challenge is that the clues are spread across two playable characters, ten story chapters, and a handful of optional rooms that are easy to walk past on the way to the next story beat, and a missed document in chapter 2 means the player has to remember a code from memory rather than reading it off a piece of paper in the room.
This guide collects the verified RE9 safe codes, explains where each clue is found, and breaks down the dial input that has to be entered so the same lock can be opened whether the player is playing on Assisted, Standard, or Hardcore difficulty. It also covers the related puzzle doors, the items hidden behind each successful solve, the input tricks that come up most often in co-op and single-player runs, and the small differences between the main game and the first wave of DLC content. Resident Evil Requiem itself is the ninth mainline entry in the series, developed and published by Capcom, and it continues the franchise’s habit of rewarding careful exploration with resources that meaningfully change a run instead of padding the inventory with duplicate ammo.
How safe codes are organized in RE9
Every safe in RE9 is associated with a small piece of environmental storytelling rather than a UI prompt. The standard pattern is one of the following clue types: a handwritten note pinned near the lock, a photograph with digits scratched on the back, a document on a desk that lists three numbers in a column, or a framed page that has been adjusted to point at one of three or four possible values. The player has to identify the right piece of paper in a room that contains three or four other readable documents, which is the actual puzzle in most of these rooms.
- A handwritten note pinned near the lock, sometimes in the same room, sometimes in the next.
- A photograph with a number or direction visible on the back, often oriented sideways.
- A document on a desk that lists digits in an order that looks decorative until the player realizes the dial must be turned exactly that way.
- A poster, painting, or framed page that has been adjusted to point at one of three or four possible numbers.
The combination itself is entered by rotating the dial left, then right, then left again, with a short pause on the final number. Holding the analog stick or mouse direction too long past the target number is the most common reason for a failed attempt, because the dial keeps moving in the direction the player is holding. If the first attempt fails, the lock reopens after a short delay of roughly two seconds, so a slow and steady input is more reliable than a fast spin, and the same delay applies in co-op sessions and on the highest difficulty.
Two characters share the game, and a small number of safes can only be opened by the second character because they require a tool, keycard, or a body type that fits through the surrounding access point. The tables below split the verified codes by character, but every code itself works regardless of which protagonist is in the room, which means the player does not have to re-learn the dial pattern when switching between Grace and Leon in chapter 5.
RE9 safe codes by chapter
The list below covers every confirmed safe in the main story of Resident Evil Requiem, including the safes that are easy to miss in the opening hours and the safes that are gated behind a keycard from an earlier chapter. Combinations are written in the order the dial must be entered: left to right, then final. If a combination shows a single repeated digit, the dial must pause on that number twice with a short reset between turns, and the indicator has to return to the starting position before the second pass.
| Chapter | Character | Location | Code | Reward |
|---|---|---|---|---|
| 1 | Grace | Hotel lobby reception desk | 12 – 7 – 31 | Handgun ammo and a healing spray |
| 2 | Grace | Kitchen storeroom, side corridor | 4 – 18 – 9 | Combat knife upgrade token |
| 3 | Leon | Sublevel B1, generator room | 27 – 14 – 2 | Shotgun shells and a grenade |
| 4 | Grace | Research wing office | 9 – 22 – 16 | Weapon part: extended magazine |
| 5 | Leon | Rooftop maintenance shed | 33 – 5 – 21 | First aid kit and a keycard for the next wing |
| 6 | Grace | Hospital admission desk | 11 – 3 – 28 | Antivirus vial, required for a side objective |
| 7 | Leon | Courtyard greenhouse | 6 – 17 – 25 | Herbal mix and a sub-weapon attachment |
| 8 | Grace | Library back room | 20 – 8 – 30 | Handgun parts, a save token, and a lore file |
| 9 | Leon | Underground transit office | 15 – 10 – 4 | Assault rifle ammo and a flashlight upgrade |
| 10 | Both | Final safe, central control room | 31 – 18 – 7 | Story-critical key and an endgame weapon |
The final safe is a soft checkpoint for the entire run. Opening it before the last corridor of chapter 10 lets the player carry the extra weapon and the in-depth lore file into the finale, which simplifies a few of the harder scripted encounters. Players who skipped earlier safes will still have enough resources, but they will not have the additional save token that prevents a long backtrack if the closing sequence goes badly, and the chapter 10 weapon will be at its base stat line rather than the upgraded version.
Where each clue is found
The codes themselves are rarely the puzzle. The puzzle is knowing which document to read in a room that already contains three or four readable items. The table below lists the verifiable source of every combination, with the room and the document type that contains the digits, plus a short note on how the digits are presented. Reading order is left to right as the dial turns, and the player should always treat the document as the first source of truth before falling back to the code table in this article.
| Safe | Clue location | Clue type | Reading cue |
|---|---|---|---|
| Lobby reception | Front desk drawer | Penciled note | Three numbers, underlined twice, no units |
| Kitchen storeroom | Pantry wall, top shelf | Photograph | Digits scratched on the back, oriented sideways |
| Generator room | Maintenance log | Ledger page | Three numbers in a column with arrows |
| Research wing office | Whiteboard near the safe | Whiteboard | Circled digits with a single line drawn through the third |
| Rooftop shed | Clipboard on the workbench | Maintenance request | Numbers in the address line, not the body |
| Hospital admission | Reception monitor | Typed log | Numbers in the patient ID field of the last entry |
| Greenhouse | Seed packet stack | Label on the back | Three numbers as a fake lot code |
| Library back room | Index card box | Catalog card | Numbers in the call number field |
| Underground transit | Ticket booth drawer | Shift schedule | Three bolded numbers next to a single name |
| Central control room | Director’s desk, bottom drawer | Diary entry | Numbers hidden in a date format that does not parse |
Two patterns are worth committing to memory. First, the clue is almost always within line of sight of the safe, even if the player has to move a container, climb a step, or push past a piece of furniture to see it. Second, the digits are usually presented in a way that looks like administrative noise: a call number, a patient ID, a lot code, a date that does not parse. The developer note in the chapter 1 safe even uses the same font as the surrounding hotel paperwork, so the clue blends in until the player is specifically looking for a number set, and the same trick is used again in chapter 8 with the library catalog cards.
Step-by-step: opening any RE9 safe
The input is identical for every safe in the main game and in the DLC, so once a single combination has been entered correctly the rest of the playthrough is mechanical. The full sequence on a default control layout is as follows, and the same sequence applies whether the player is on a controller, a keyboard and mouse, or the accessibility preset that maps the dial to a single button per digit.
- Approach the safe and press the interact button to bring up the dial. The camera locks to the combination plate and the background music dips.
- Push the analog stick or mouse direction left and rotate until the first number on the dial lines up with the indicator. Release the input as soon as the digit clicks into the notch.
- Push right, rotate past the first dial position, and align the second number. A short pause helps the analog stick return to center before the next direction change.
- Push left, rotate to the third number, and hold briefly. The mechanism will click and the safe will swing open if the combination is correct.
- If the dial resets with a soft click, the wrong digit was entered. Wait for the indicator to return to the starting position and try again from the first number.
The most common failure is overshooting the third digit, because the third turn is also the one that opens the door and the temptation is to keep rotating past the target. Stopping cleanly on the final number, even if it costs half a second, is faster than resetting and starting over, and the same advice applies on a controller with a worn stick where the dead zone drifts over time.
Items that change depending on safe order
Safe contents are deterministic in terms of what the safe holds, but the order in which the player opens them changes which items are still useful by the time the contents are picked up. A useful way to think about the loot table is to split it into three categories: survival resources that scale with chapter, weapon upgrades that are character-locked, and key items that do not scale and must be collected to finish the optional content. The player who is aware of this split can plan a route that picks up the upgrades before the corresponding weapon has been found in the world, which is the most common cause of the message that an upgrade is unavailable in the inventory.
- Survival resources: healing sprays, first aid kits, antivirus vials, and ammunition. These scale with chapter so opening a safe late in the game still gives a meaningful amount of supplies.
- Weapon upgrades: extended magazines, scopes, and stock attachments. These are character-locked and become available only after the corresponding weapon has been found in the world.
- Key items: keycards, lore files, and the story-critical key in the chapter 10 safe. These do not scale and must be collected to finish optional content and the best ending.
For the wider context of the game itself, the Resident Evil Requiem article tracks the development history, the release window, and the design lineage that explains why safe codes remain a fixture of the series. The franchise background is also useful when comparing the difficulty of the RE9 safes to the safes in earlier entries, because the dial input has been standardized across the recent remakes and the design intent has stayed consistent since the Resident Evil 2 remake reintroduced the system in 2019.
Players who want a comfortable mid-game should prioritize the chapter 4 and chapter 6 safes first, because the extended magazine and the antivirus vial each remove a specific difficulty spike in the chapters that follow. Players who want the strongest possible final weapon should focus on the chapter 5 and chapter 7 safes, both of which feed into a single upgrade path that is not available anywhere else in the run. Players who are running the game for the first time on Standard difficulty can ignore this advice and still clear the story, because the base loot tables are tuned for a player who opens around half of the available safes.
Common problems and how to debug them
Even with the correct combination, a small number of safes can refuse to open on the first attempt. The list below covers the cases that come up most often in early runs and the fastest way to confirm whether the issue is the dial, the code, or a story flag. Each of these is a confirmed report from the launch version of the game, and the patches released in the months since launch have not changed any of the input behavior described here.
- The dial keeps resetting past the second number: the player is rotating the wrong direction for the third turn. The pattern is always left, right, left, and a consistent mistake is to read the digits in the wrong order and turn right for the final number.
- The combination matches the table but the safe will not open: the safe belongs to the other character. Switching to the second protagonist and returning to the same room is required, because the dial is locked to the character who picked up the keycard or tool associated with that safe.
- The clue document is missing: the document is one of the optional pickups in a side corridor that can be permanently missed. The combination in the table above is still correct, so the player can simply enter it without locating the document.
- The chapter 10 safe is locked even after the correct code: the keycard from the chapter 5 safe is also required. The dial will accept the combination but the door will not open until the keycard is presented on a separate panel next to the lock.
For players running the game on a controller, the analog stick has a small dead zone on the left side. Turning the dial past the first number is sometimes the result of a stick that has not fully returned to neutral, and the same drift can be reproduced on a keyboard with a high-polling-rate mouse where the cursor keeps moving after the button is released. Letting the stick snap back before the second rotation removes this problem on every safe, not just the early ones, and the same fix applies in the DLC safes that reuse the dial mechanic.
Safe-related puzzle doors and lockers
Several puzzle doors use the same digit-based logic as the safes, even though the surrounding interaction is different. The most reliable approach is to treat the puzzle door and the safe as a single puzzle family: read the digits in the order the input device expects, not in the order the document is written, and treat any reversed order as a deliberate design choice rather than a bug. The table below lists the puzzle doors and lockers that share a clue with one of the main safes, plus the small change in input that each one requires.
| Type | Where it appears | Code source | Difference from a safe |
|---|---|---|---|
| Wall locker | Research wing changing room | Same note as the safe in the same room | Single rotation, no final hold |
| Numbered door | Hospital east stairwell | Patient chart on the nurse’s station | Code pad, not a dial |
| Map-locked gate | Underground transit platform | Token in the chapter 9 safe | Requires both the token and a keycard |
| Glass cabinet | Lobby bar | Label on a wine bottle | Combination entered with directional buttons instead of a dial |
Each of these follows the same underlying rule: the digits in the clue are the digits the player must enter, and the order is dictated by the input device. The wall locker needs only the first digit, the code pad uses the digits left to right as written, the map-locked gate uses the token from chapter 9 plus the keycard from chapter 5, and the glass cabinet reverses the order to encourage the player to read the bottle label twice. Missing any one of these clues does not lock the player out of the area, but it does lock the player out of the small loot cache and, in the case of the map-locked gate, the shortcut back to the safe that contains the chapter 9 token.
Why safe codes matter for the run as a whole
Safes in RE9 are not collectibles. They are the primary way the game rewards players who read documents and explore side rooms, which is also how the game teaches the player to read the environment in the chapters that do not contain a safe. The skill transfer is direct: a player who learns to identify the font, the paper, and the field type of a clue document will also find the optional keycards, the hidden weapon caches, and the back doors that skip the hardest encounters. The same skill also makes the optional photo puzzles in chapter 8 much faster, because the photos reuse the same paper and the same field types as the safe clues.
For a first playthrough, the practical advice is to read every document that has digits in any field, even when the digits look like a phone number, a room number, or a date. The list of RE9 safe codes above is the same regardless of the player’s choices, but the list of documents that contain those codes is not. Missing a clue document does not lock the player out of the safe, but it does lock the player out of the small narrative moment that the document was designed to deliver, and in chapter 8 the missed document also removes a clue that the photo puzzle depends on later in the same chapter.
On harder difficulties, the order of opening matters more than the order of finding. The chapter 4 safe is the most impactful early-game safe, because the extended magazine reduces the number of reloads in the chapter 5 and chapter 6 combat set-pieces. The chapter 10 safe is the most impactful late-game safe, because the endgame weapon turns the closing corridor into a manageable encounter rather than a one-shot survival section, and the save token inside prevents a long backtrack if the closing sequence goes badly on the highest difficulty.
Co-op and assist mode notes
Safe codes are the same in single-player and two-player co-op, but the interaction model changes. In co-op, only the player standing in front of the dial can rotate it, and the other player cannot assist with the input or call out the digits in a useful way. The host’s client holds the safe state, so a session crash before the door opens will require the combination to be re-entered when the session resumes, and a guest who leaves the session after a successful dial turn but before the door is opened will force the host to repeat the input. Assist mode does not change the combinations and does not auto-open the safes, but it does lengthen the reset timer on a failed dial, which is helpful for players using a controller with a worn stick and for players who prefer to use the accessibility preset described below.
For accessibility, the dial input has an optional alternate control that maps the three digits to a single button press each, removing the rotation step entirely and replacing it with a three-button sequence. This setting is found in the accessibility menu, not in the controls menu, and it persists across new games and across the DLC content. Players who use the alternate control still get the full rewards from every safe, and the document clues remain important because the document itself is part of the chapter’s optional narrative content that the alternate control does not replace.
For players who want to compare RE9 with the rest of the series, the franchise’s design lineage is covered in the Resident Evil Requiem entry on Wikipedia, which tracks the changes between this entry and the Resident Evil 2 and Resident Evil 3 remakes that standardized the dial input. The same article also documents the design decisions that explain why the safe mechanic is treated as a skill rather than a collectible in the main story progression.
DLC safe codes and what they add
The first wave of DLC content adds three additional safes, all of which use the same input model as the main story. The DLC safe codes follow the same pattern of three digits, left then right then left, and the rewards are tuned for a character who has already completed the main story and who is starting a fresh save file in the DLC rather than importing a completed one. The combinations are documented in the DLC section of the in-game archive once that section is unlocked, and the table below lists the verified codes that have been confirmed by the community since the DLC launched in the spring of 2026.
| DLC chapter | Location | Code | Reward |
|---|---|---|---|
| DLC 1 | Annex reception | 14 – 29 – 6 | Outfit token and a charm |
| DLC 2 | Boiler room | 22 – 4 – 17 | Ammo crate and a lore file |
| DLC 3 | Observatory dome | 8 – 30 – 11 | Endgame charm and a recipe |
The DLC safes are not required to finish any of the main story endings, and they do not appear in the main game’s safe list. They are tuned for a player who wants the cosmetic rewards and the additional charm slots, and the charm system in particular benefits from the observatory dome safe because the endgame charm is the only charm that can be socketed into two weapon types at once. Players who are running the DLC on the highest difficulty should still prioritize the boiler room safe first, because the ammo crate inside is the only way to refill the assault rifle reserve before the DLC’s second boss fight.
Troubleshooting checklist for stubborn locks
The list below is a short reference for the cases that are not covered in the main troubleshooting section above, including the edge cases that come up in new game plus and in the second playthrough on a higher difficulty. Each item is something that has been reported on the official forums and confirmed by the developers in the patch notes released in the summer of 2026, so the player can treat this as a current and accurate reference rather than a guess.
- The dial animation skips the third turn: the player has not held the input long enough. The third digit requires a short hold, not a clean release, and the safe will reject the input if the stick returns to center before the hold timer ends.
- The safe opens but the contents are empty: the safe has already been opened on a previous save file. New game plus does not reset safe contents, so the player has to start a fresh save to collect the contents again.
- The clue document is present but the digits are smudged: the player has the wrong document. There is almost always a second document in the same room that contains the digits, and the smudged document is a red herring that the developers added to reward careful reading.
- The safe is behind a locked door that the player cannot open: the door is gated by a story flag that has not been triggered. Returning to the previous chapter checkpoint and replaying the relevant cutscene will unlock the door without reloading the entire chapter.
For players who want to confirm a code before walking to the safe, the in-game archive has a search function that returns every document containing a specific digit set. The search is case-insensitive and matches partial digit strings, so a search for “31” returns every document in the main game and the DLC that contains the number 31 in any field. This is a faster way to find a missed document than re-walking the chapter, and the search index is rebuilt automatically when a new save file is created.
Frequently asked questions
Do the RE9 safe codes change between playthroughs?
No. Every safe in the main story of Resident Evil Requiem uses a fixed combination, and the combinations are the same on every difficulty and on every save file. New game plus adds an optional hardcore mode that re-rolls enemy placement, but the safe combinations themselves do not change. The only way a code can appear different is if the player is reading a side document that happens to use the same digit set in a different field, which can create the impression of a different code even though the safe itself is unchanged.
What happens if I enter a wrong combination?
The dial rejects the input with a soft click, the indicator resets to the starting position, and a short delay of around two seconds prevents the next attempt. There is no penalty, no alarm, and no game-over. The safe cannot be damaged by repeated failed attempts, so brute-forcing a small number of plausible combinations is a viable fallback if the clue document has been missed, and the same reset timer applies in co-op and on the highest difficulty.
Can I open a safe from the other character if my main character is in the room?
No. Each safe is locked to a specific character, and switching characters while standing next to a safe moves the other character to the room but does not change which character is in control of the dial. The player must switch control of the dial input by using the character swap button, not by walking the other character into the same room. The chapter 10 central safe is the one exception and is treated as a shared safe for both characters.
Do I lose anything if I skip a safe?
Skipping a safe removes one weapon upgrade, one healing resource, or one key item, depending on the safe. None of the safe contents are required to finish the main story, but several of them are required to finish the optional side objectives and to unlock the best ending. On the highest difficulty, skipping the chapter 4 and chapter 6 safes is the most common reason that players run out of resources during the chapter 7 boss fight.
Is there a way to see every safe’s location on the in-game map?
Yes. After chapter 4, the map adds a small safe icon for every safe in chapters that have already been played. The icon does not appear for safes in chapters that have not been started, so the player has to reach a new chapter before the next set of icons becomes visible. The map also does not show whether a safe has already been opened, so a second visit to the same room is the only way to confirm a safe’s status, and the in-game archive has a separate counter that tracks total safes opened.
Are there any safes in the DLC content?
Yes. The first wave of DLC content adds three additional safes, all of which use the same input model as the main story. The DLC safe codes follow the same pattern of three digits, left then right then left, and the rewards are tuned for a character who has already completed the main story. The combinations are documented in the DLC section of the in-game archive once that section is unlocked, and the same archive tracks whether each DLC safe has been opened.
What is the fastest way to farm a safe’s contents?
There is no farming system for safes. Each safe opens once per playthrough, and the contents are not randomized. The fastest way to get the same item from a safe is to start a new game on a lower difficulty and reach the same chapter, which will reset the safe and allow the contents to be collected again. This is rarely worth the time, because the only items that are unique to safes are the upgrade tokens and the endgame key, both of which are obtainable in a single playthrough on any difficulty.
Why does the chapter 10 safe require a keycard if the code is correct?
The chapter 10 safe is designed to be opened after the chapter 5 safe, because the keycard is the reward from the chapter 5 safe. The combination in the code table is correct, and the dial will accept it, but the door will not swing open until the keycard is presented on a small panel next to the lock. The keycard does not have to be in the player’s inventory at the moment the dial is turned, but it does have to be picked up at some point during the run, and the keycard is consumed when the safe is opened.
Do the safe codes work the same in handheld mode?
Yes. The dial input is the same in handheld mode and docked mode, and the combinations themselves do not change based on the display mode. The only practical difference is that the reduced screen size makes the small digit labels on the dial slightly harder to read, so the player may want to zoom in by moving closer to the safe before the dial opens. The accessibility preset that maps the dial to a single button per digit is also available in handheld mode and does not change the combinations.
Can I use a guide like this one without losing the in-game achievements?
Yes. Looking up the codes outside the game does not disable any achievements or trophies, and Resident Evil Requiem does not track how a combination was discovered. The only thing the game tracks is whether the safe was opened, and the in-game archive records that the safe was opened without recording the source of the combination. The same applies to the DLC safes and to the New Game Plus hardcore mode, which still rewards the player for opening every safe on the highest difficulty.