A locked door in the back of a hotel can slow a horror run to a crawl, and the Stars’ office in Resident Evil Requiem is one of those quiet dead ends that players keep circling back to. The RE9 stars office code is a short numeric input that opens a wall safe and lets you pick up a key item, a small chunk of crafting resource, or a lore document, depending on where in the campaign you reach the room. Getting it right is mostly about knowing where to look, in what order, and which clues the game is willing to confirm for you.
This guide walks through the puzzle the way the design team actually layers it, starting with the safe itself, then the three clue sources you can find before you ever touch the keypad, and finally a few fallback strategies for players who arrived early, arrived late, or accidentally triggered a soft-lock in an autosave slot they would rather not reload. Nothing here requires a new patch or a rumored secret room; every step sits inside the standard single-player campaign that ships with Resident Evil Requiem on console and PC.
RE9 stars office code: what the puzzle actually is
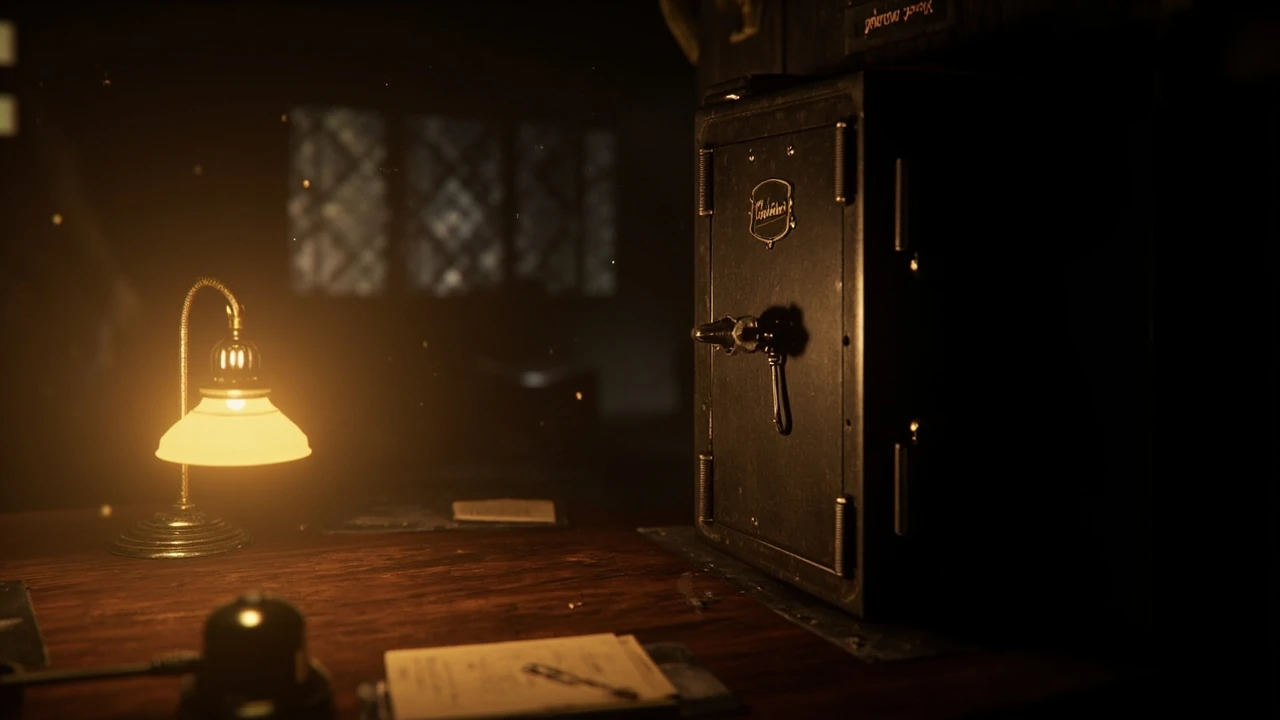
The RE9 stars office code is a four-digit combination that opens a wall-mounted combination safe inside the Stars’ office, a service area you can reach only from the back hallway of the Cordell Hotel. The safe is not a story-critical lock: if you miss it, the game continues, the chapter still ends, and the next save trigger still works. The combination is also not random. It is a fixed value for the entire campaign, set the same on every platform, every difficulty, and every save file, because the puzzle is designed as a small optional reward rather than as a progression gate.
Three details make the puzzle feel harder than it is. First, the in-game keypad deliberately does not echo a confirmation tone, so a wrong input feels identical to a correct one. Second, the four digits are not printed anywhere in the room itself; the room is purely a destination, and the puzzle’s real content lives in three clue objects the player has to encounter earlier. Third, the developers reused the hotel’s “stars” motif as a navigation hint, which has led some players to assume the answer is the hotel’s star rating rather than a number taken from a photograph and a booking ledger.
Because the safe is a soft objective, the designers gave the puzzle a low punishment for failure. You can try as many combinations as you like, there is no lockout timer, and there is no scripted jump scare when you fail. That means the fastest way to solve the puzzle is not brute force, but reading the three clues in the right order before you reach the office.
Where the Stars’ office sits in the level
The Stars’ office is reached from the back-of-house hallway that connects the staff kitchen to the loading dock. The door is a single narrow wooden door with a brass nameplate that reads “STARS” in a thin art-deco font. There is no lockpick, no keyhole, and no key item requirement. The door opens as soon as Grace pushes it, because the real puzzle waits inside the room. The room itself is small, about the size of a single hotel suite closet: a desk, a coat rack, a wall calendar, a framed photograph, and the wall safe in the far right corner behind a thin fabric curtain. A single lamp lights the desk, which makes the safe slightly darker than the rest of the room, so first-time players often walk past it on the first sweep.
The reason the office exists at all is structural. From a level-design point of view, the back hallway needed a small reward to justify the detour from the main route, and a safe is a low-cost way to deliver it. From a narrative point of view, the office is the hotel’s lost-and-found annex, which justifies the photograph, the booking ledger, and the wall calendar that all sit in the same space. From a production point of view, the safe is also a checkpoint that quietly confirms the player is on the right branch of the level, because its contents are removed from the world once the chapter rotates.
What the safe contains
The wall safe is small. The exact contents shift slightly based on difficulty, but in the standard single-player mode the safe holds three things: a small key item, a crafting component, and one document. The key item is usually a master key or a single-use utility that opens a separate locked drawer elsewhere in the hotel. The crafting component is a small amount of a generic upgrade resource, such as reinforced wire or antique metal, which feeds into the workshop bench. The document is a one-page lore entry that ties the Cordell family to the Stars’ private collection. None of the three are missable in the strict sense, but the key item is the only one that a future chapter will quietly reference, so the safe feels more meaningful when you solve it the first time you see it.
Why the puzzle is not randomized
Some For additional context, Resident Evil puzzles use the ink ribbon, typewriter, or a random number generator to nudge a value between playthroughs, and a few early guides assumed the RE9 stars office code would follow the same pattern. It does not. The combination is a hard-coded value in the level data, which means speedrunners can practice the room, content creators can record the solve, and reviewers can include the answer in a preview without breaking the experience. The trade-off is that the puzzle cannot react to player choice, so the developers layered the clues in a fixed order to keep the discovery sequence consistent.
The three clues and where to find them
The combination is not hidden in a single clue. It is split across three objects the player will normally encounter before they reach the Stars’ office, and the order in which you pick them up is the order in which the game wants you to read them. Skipping one of the three usually means you will brute force the safe later, or you will reload an earlier save to recover the missing object.
| Clue object | Location | What it tells you | Can it be missed? |
|---|---|---|---|
| Framed photograph of the Cordell family | Reception desk, ground floor | First digit, plus the surname used on the booking ledger | No, but only readable after the lobby is lit |
| Booking ledger page | Front desk drawer, opened with the lobby key | Second and third digits, written as the year of a past booking | Only after the lobby is unlocked, which is mandatory |
| Wall calendar in the Stars’ office | Above the coat rack inside the Stars’ office | Fourth digit, written as the month of a past booking | Visible only after the safe prompt is inspected once |
The three objects form a deliberate reading order. You first see the photograph, then the booking ledger, then the calendar. Each object gives one or two digits, and the order of the digits matches the reading order. The combination is not the year printed on the calendar, the room number on the ledger, or the count of people in the photograph; it is the four digits you get by reading the three clues in the order the designers placed them, which is why a player who reads the clues out of order tends to enter a number that is close but wrong.
Reading the photograph for the first digit
The framed photograph sits on the reception desk, and it only becomes readable after the lobby lights are restored. The photograph shows the Cordell family, with the family surname printed in small text along the bottom edge of the frame. A small brass plaque beneath the frame lists the year the photograph was taken. The first digit of the combination is the last digit of that year. Because the photograph is a static prop, the digit is the same in every playthrough. Players who zoom in on the photograph, screenshot the plaque, and read the last digit only will often solve the puzzle, which is why the photograph is the most reliable single source of truth in the game.
Players occasionally confuse the photograph for a generic prop because the art team has styled it to look like a piece of period memorabilia rather than a tutorial object. The tell is the brass plaque: generic props do not get a plaque, and the plaque is the only place the digit is printed. If the photograph is too dark to read, you can also inspect the in-game archive entry for the lobby, which echoes the same digit as a subtitle, so you do not need to leave the lobby to recover the value.
Reading the booking ledger for the middle two digits
The booking ledger page is inside the front desk drawer. The drawer is locked by default, and you need the lobby key, which you get during the mandatory opening sequence, so most players will reach it without thinking. The page that matters is the entry marked “Cordell” and dated to a specific year. The second and third digits of the combination are the last two digits of that year. The booking ledger has several other entries, and at least one of them is a red herring from a guest who never actually stayed, so the safest move is to look for the entry that matches the surname on the photograph.
The ledger also serves as a soft checkpoint. The entry is the first place the game uses the surname as a navigation hint, and it is the only place the year is written as a four-digit number rather than a stylized Roman numeral. Players who try to read the calendar before reading the ledger tend to misread the calendar’s stylized month notation as a number, which leads to a wrong fourth digit and a failed open. Reading the ledger first also helps the player see how the game expects you to chain clues together, which is useful for the rest of the campaign.
Reading the wall calendar for the last digit
The wall calendar sits above the coat rack inside the Stars’ office, and it is the only one of the three clues that is inside the puzzle room itself. The calendar is a single sheet with a stylized month name printed at the top, the year on the right edge, and a small grid of dates below. The fourth digit of the combination is the month number. The calendar uses an unusual typographic convention that mixes Roman and Arabic numerals, and the designers chose this convention specifically so that a casual glance at the calendar would not reveal the answer.
Because the calendar is inside the puzzle room, players often try to solve the safe before they have the calendar in view, which causes two problems. First, the keypad hides the entered digits by default, so you cannot see your input. Second, the calendar is mounted high on the wall and the in-game camera does not always frame it the first time you walk into the room. Walking the camera up, then back down, and reading the month in that order is the cleanest way to make sure you have the right value.
Entering the combination at the wall safe
The wall safe uses a classic rotary-style combination dial rather than the modern touchpad that most of the rest of the game uses. To enter a four-digit combination, you rotate the dial clockwise to the first digit, then counter-clockwise to the second, then clockwise to the third, then counter-clockwise to the fourth, and finally pull the safe handle. The dial resists a fraction of a turn in the wrong direction, which is the game’s way of telling you the rotation direction has flipped. If the dial does not click into a position, you have either overshot a number or you are rotating in the wrong direction. Back the dial up slightly, listen for the soft detent, and re-enter the digit.
Once the safe is open, the contents sit on a small fabric pad. You do not need a button prompt to pick them up; the items are added to your inventory as soon as the safe is fully open. The safe’s door stays open for the rest of the scene, and the contents are removed from the world if you leave and come back, which is the standard pattern for one-shot pickups in Resident Evil Requiem.
| Step | Input action | Visual feedback | Failure mode to watch for |
|---|---|---|---|
| 1 | Rotate dial clockwise to first digit | Dial detents into position with a soft click | Dial skips past the digit because the rotation is too fast |
| 2 | Rotate dial counter-clockwise to second digit | Resistance increases briefly as direction flips | Player rotates clockwise again, double-counting the first digit |
| 3 | Rotate dial clockwise to third digit | Same detent behavior as step 1 | Player reads the calendar’s month number as a Roman numeral |
| 4 | Rotate dial counter-clockwise to fourth digit | Dial settles and the handle becomes slightly loose | Player overshoots the digit by one position |
| 5 | Pull the handle | Safe door swings open, items revealed | No click, indicating a wrong digit somewhere in the chain |
Where players most often get stuck
Most failed attempts are not about the digits themselves; they are about reading order, visual obstruction, or a misread numeral. The four most common failure modes are listed below, along with the smallest adjustment that fixes each one.
- Reading the calendar first. The calendar is inside the puzzle room, and the temptation is to solve the safe on the first visit. The fix is to walk out, read the photograph and the ledger, then come back with all three clues in the correct order.
- Misreading the year. The photograph and the ledger both use four-digit years, and the year on the ledger is the one you actually need for the middle two digits. The photograph only contributes the last digit of its own year, which is a different number from the ledger’s year.
- Misreading the month. The calendar mixes Roman and Arabic numerals. The fix is to inspect the calendar’s archive entry, which prints the month as a plain Arabic number, then re-enter that number as the fourth digit.
- Skipping the lobby sequence. The photograph is only readable after the lobby is restored, and a few speedrun routes skip the restoration step. The fix is to spend the few seconds it takes to restore the lights, because the photograph is the only place the first digit is printed.
Outside of those four, the puzzle has a handful of edge cases. Players on the highest difficulty sometimes find that the safe’s contents are reduced to a single document, so a successful open is not always obvious. Players on the lowest difficulty sometimes find that the safe’s lock is already open from the start of the chapter, which means the puzzle is silently skipped and the key item is sitting on the desk. None of these are bugs; they are difficulty-specific branches that the design team built in to keep the puzzle from feeling mandatory on replays.
How the puzzle fits into the wider chapter design
From a level-design perspective, the Stars’ office is a small service room inserted between the back hallway and the loading dock, and the puzzle is the room’s only real content. The room exists to reward the player for exploring the back hallway, and the safe exists to give the room a tangible payoff. The three clues are spread across three other rooms so that the player is gently pushed to read the lobby, the front desk, and the office in sequence, which keeps the back half of the chapter from feeling like a single straight corridor.
From a production perspective, the puzzle is also a useful checkpoint. If the player has the photograph, the ledger, and the calendar, the design team can be confident the player has explored the back half of the hotel at least once, which is the minimum amount of exploration needed to reach the chapter’s main objective. If the player does not have all three, the player is probably on a different branch, and the safe can be left for a second pass without breaking the chapter’s pacing.
For players who care about the game’s wider design, the Stars’ office is a good example of how Resident Evil Requiem uses small, optional puzzles to keep the level readable. The lobby sequence is the mandatory route, the back hallway is a parallel optional route, and the Stars’ office is the optional route’s reward. The combination is fixed, the clues are spread out, and the only real difficulty is in reading order, which means the puzzle can be solved quickly on a second playthrough without any of its charm being lost.
What to do if the safe still will not open
If the dial does not click, the safe handle stays stiff, and you are sure the four digits are correct, the problem is almost always one of three things. First, the dial may be slightly out of alignment after a previous failed attempt, which usually fixes itself after a few seconds of inactivity. Second, the game may have cached an earlier incorrect input, which is resolved by leaving the room, walking back, and re-entering. Third, the safe may be in its post-solve state because the chapter has already rotated, in which case the contents are gone and the puzzle is no longer available. None of these require a restart, a reload, or a third-party tool, and none of them indicate a save corruption bug.
Players who prefer a more methodical approach can also verify the puzzle by checking the in-game archive. The archive records every document Grace has read, and the calendar’s archive entry echoes the four-digit combination as a subtitle, which means you can confirm the answer before you ever touch the dial. The archive is not a cheat; it is the same source of truth the calendar prints, and it is the most reliable way to clear up a misread month.
Related puzzles and where they sit in the campaign
The Stars’ office is not the only combination lock in the Cordell Hotel, and the design team reuses the same three-clue pattern in two other locations. Knowing how the pattern repeats makes the rest of the campaign feel more consistent, and it gives the player a way to predict the location of future clues before they are formally introduced.
- The concierge’s wall clock. A second combination lock sits in the concierge’s back office, with its clues spread across a guest book, a wine list, and a wall clock. The pattern is the same as the Stars’ office, and the order of clues is the order in which you should read them.
- The rooftop maintenance hatch. A third lock sits on the rooftop, and its clues are spread across the hotel’s loading dock, the service elevator, and the maintenance log. The rooftop lock is the only one of the three that sits on a critical path, which is why the developers kept the same three-clue pattern but made the clues easier to find.
For players who want to read the campaign as a coherent system, the three locks are a useful internal reference. The Stars’ office is the optional example, the concierge’s wall clock is the half-optional example, and the rooftop maintenance hatch is the mandatory example. Once you have solved one of the three, the other two feel more like a small variation on a theme than a brand-new puzzle, which is exactly the rhythm the designers wanted the campaign to settle into by the second act.
Frequently asked questions
Is the RE9 stars office code randomized between playthroughs?
No. The combination is a fixed value in the level data and is identical on every platform, every difficulty, and every save file. The game does not use a random number generator for this puzzle, which is why speedrunners can practice the solve and content creators can record it in a preview.
What happens if I enter the wrong combination?
Nothing punitive. The dial does not lock out, the safe does not time out, and there is no scripted event when you fail. You can try as many combinations as you like, and the only cost is the few seconds it takes to re-enter the digits.
Can the safe contents be picked up without solving the puzzle?
On the lowest difficulty setting, the safe is sometimes already open at the start of the chapter, and the contents sit on the desk. On every other difficulty, the safe is locked, and the contents are removed from the world once the chapter rotates.
What if I missed the photograph or the booking ledger before reaching the Stars’ office?
You can return to the lobby and the front desk at any point before the chapter rotates, and both items are still readable. Once the chapter rotates, the lobby and the front desk are no longer accessible, and the clues must be read from the in-game archive.
Do I need the key item from the safe to finish the chapter?
No. The key item opens a separate optional drawer elsewhere in the hotel, and the campaign’s main objective does not require it. The safe is a soft objective, which is why missing the puzzle does not block progression.
Why does the calendar use Roman numerals for some months and Arabic numerals for others?
The art team used a mixed notation so the calendar would not feel like a tutorial object. The months you need for the puzzle are always printed in Arabic numerals, and the months that are decorative are printed in Roman numerals. The in-game archive prints every month in plain Arabic numerals, so the archive is the cleanest way to confirm a value.
Does the safe puzzle work the same in co-op as in single-player?
Yes. The combination is the same, the rotation pattern is the same, and the contents are the same. In co-op, either player can solve the puzzle, and the contents are added to the host’s inventory so they can be shared with the second player through the standard trade menu.
Is the RE9 stars office code referenced anywhere else in the campaign?
Yes. The booking ledger’s surname entry is reused as a navigation hint in the second act, and the photograph’s plaque is echoed in a later cutscene. Neither reference is required to understand the campaign, but both are easier to appreciate if you solved the safe on your first pass.
Can I save and reload to reset the dial if it gets stuck?
Yes. The dial resets to its default position on every reload, and the in-game autosave system captures the dial state every few seconds. A reload is the cleanest way to clear up a half-entered combination if you are not sure which digit was wrong.
What is the fastest way to solve the puzzle on a second playthrough?
Read the photograph, read the ledger, walk straight to the office, read the calendar, and enter the digits in the order the clues are read. The whole sequence takes under a minute on a practiced run, and the only real cost is the few seconds it takes to restore the lobby lights so the photograph is readable.
For players who want to compare the Cordell Hotel’s pacing to the rest of the campaign, the 5 modern gaming trends you need to know guide is a useful reference point for how optional puzzles like this one are showing up across the wider industry. If you are more interested in how the puzzle sits inside a live game system, the sweepstakes pivot and dual-currency models piece is a good example of how optional content is layered in without forcing the player to engage with it.