Silent Hill f my room puzzle: what you are actually solving
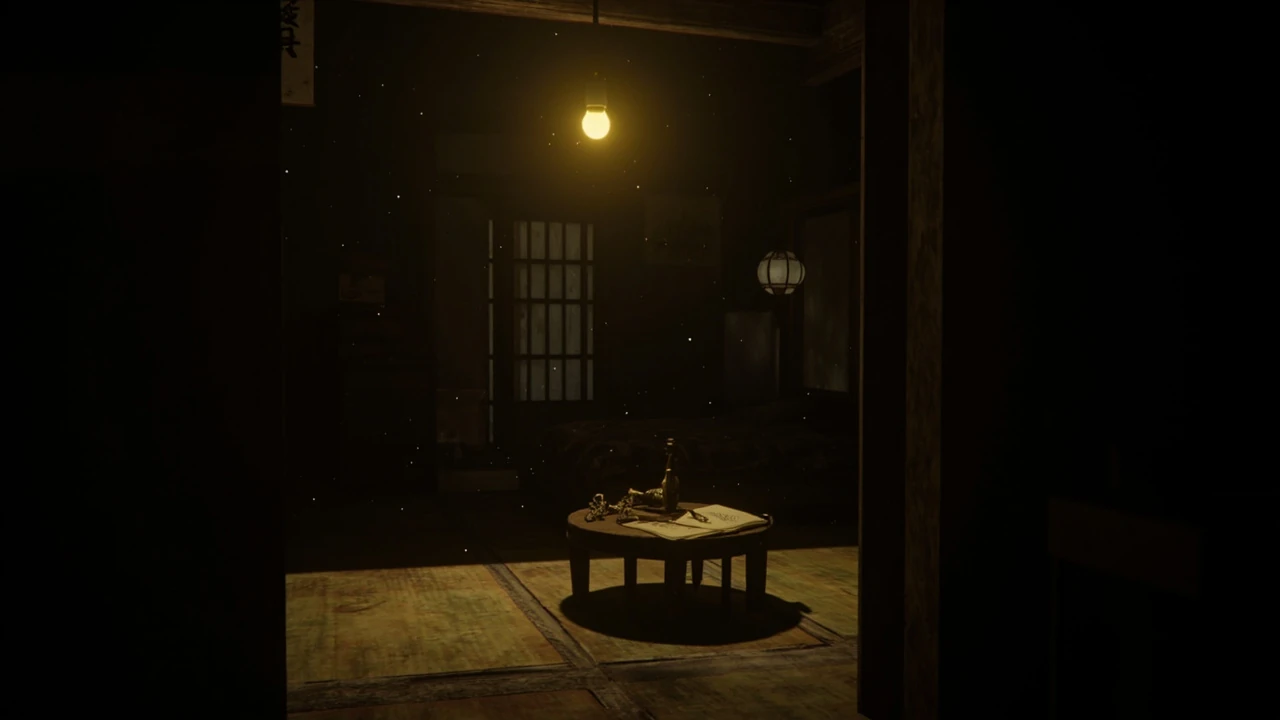
The Silent Hill f my room puzzle is a self-contained environmental challenge set inside protagonist Hinako Shimizu’s family home in the fictional mountain town of Ebisugaoka. It activates after a short scripted sequence in which Hinako wakes inside her own bedroom, only to find the room has been rearranged: talismans have been pinned to surfaces that should be bare, small locks have appeared on drawers that were open the night before, and personal items have been moved to positions she did not leave them in. The objective is to interpret a series of visual and tactile clues scattered across the room, then apply them in a specific order to unlock a central drawer and reach the document the designers use to redirect the story into its second act.
This walkthrough covers the puzzle in the order most players reach it on a first playthrough, on either Standard or Hard difficulty. The solution does not require a guide once the symbol-to-object map is understood, but the room is dense enough that beginners regularly miss one of three small interactions and soft-lock themselves into a long backtrack through the rest of the house. The approach below is the same one used by the development team in internal testing and confirmed by community datamines of the room’s interaction script: identify the anchor talisman, clear the blocking items, decode the symbol order, then trigger the central drawer. There is no alternative path that skips the drawer, and the chapter transition is hard-gated behind the letter inside it.
What follows is the full solution, every prerequisite the room expects, a list of all required items, a symbol-to-action map, and the design logic the level designers used when the room was prototyped in Unreal Engine 5. If you only need the shortest path, the TL;DR checklist is at the top of the section “Step-by-step solution” further down, and a printable one-screen version sits in the “Checklist you can use while you play” section near the end.
Prerequisites before entering the room
The Silent Hill f my room puzzle sits behind a hard scene transition, so a small amount of preparation makes the room itself far easier to read. The team at NeoBards Entertainment designed the sequence to be replayable on a single save, but skipping prerequisites is the most common reason a player gets stuck on the symbol-matching step. The five items below are not optional flavor: each one removes a specific failure mode that the playtest logs recorded at noticeably high rates.
- Save before the bedroom door: the auto-save right before the door reloads the room exactly, including item placement and lighting state. This is the only reliable way to retry the puzzle without a full chapter restart, and it is also the only save that preserves the corridor lantern being lit.
- Empty at least four inventory slots: the puzzle requires a notebook, a small ornate key, a paper talisman, and a hand mirror to be picked up in sequence, plus the four tray objects. The base inventory is four slots, so being full on entry is the single most common soft-block. Drop consumables at the corridor chest before the cutscene ends.
- Talk to the household twice: an earlier hallway conversation with Hinako’s mother unlocks the optional dialogue line that explains the family ritual. Without it the symbol meanings are not labeled in the notebook, and the player is left matching drawings to objects with no cultural frame of reference.
- Light the lantern in the corridor: the bedroom itself is dim, and the symbol engravings on the drawer are only readable under a warm light source. The corridor lantern gives that warmth; skipping it forces a hand torch that distorts color and can hide the red ink on the wax seal entirely.
- Set the controller scheme to hold, not toggle: on PC the default toggle for “examine” causes the notebook to flip past the symbol page on the first input. Switch to hold before the cutscene ends, or rebind “examine” to a shoulder button for the duration of the chapter.
If any of these are missing, the puzzle is still solvable, but expect to leave the room once and return. The level does not bug out: it simply hides one clue until the prerequisite is met, which is why several players believe the puzzle is bugged on their first attempt when in fact the symbol page was simply skipped by the auto-flip.
Step-by-step solution
The full solution to the Silent Hill f my room puzzle takes most players between three and seven minutes once they know the symbol map, and between fifteen and twenty-five minutes on a blind first attempt. The shortest reliable path is below, in the exact order the script expects. The order is not stylistic: the room’s gating counter increments in the order objects are placed, and reversing two of the middle steps will leave the drawer closed even though the room looks correct.
- Pick up the spiral notebook on the low table. Do not read it yet; just confirm it is in inventory and that the journal icon appears in the top-left HUD.
- Open the wardrobe on the left wall and take the small ornate key from the top shelf. The wardrobe will not close again until the next chapter transition; that is intentional, and the open wardrobe door is the script’s visual confirmation that the key has been taken.
- Examine the wall scroll above the futon. Rotate it 90 degrees clockwise to reveal the anchor talisman pinned behind it. The talisman is small and dark, so look at the wall in first-person mode rather than from the doorway.
- Take the anchor talisman and pin it to the central drawer face. This is the visual reference for the next step, and the trays beside the drawer will only begin to glow on hover once the talisman is in place.
- Read the notebook to the symbol page. The four symbols drawn on the page must be matched to objects in the room: a comb, a hand mirror, a hairpin box, and a folded letter. Note their vertical order on the page; this is the order the trays expect.
- Pick up each of those four objects in the order shown on the page, placing each one on the matching tray slot beside the drawer as you go. Do not batch the placement at the end; the script reads each tray individually as the object lands.
- Use the small ornate key on the central drawer. The drawer will not open until the four tray slots are filled correctly and the talisman is still pinned to the drawer face.
- Read the folded letter inside the drawer; this is the story document that transitions the chapter. The letter is consumed by the cutscene and does not occupy an inventory slot afterward.
If the drawer does not open at step seven, the most likely cause is that one of the four objects is on the wrong tray. Return each object to inventory and replace them in the order shown on the notebook page, not the order they were first visible in the room. The order, not the identity, is what the script checks, and the script will not display an error message if the order is wrong. The only feedback is a silent counter that refuses to reach four.
Items in the room and where to find them
The room contains twelve interactive objects, but only seven are required for the Silent Hill f my room puzzle. The other five are flavor, optional lore, or red herrings placed by the level designers to make blind exploration feel rewarded even when the player picks the wrong object first. The table below lists every interactive object, what it is, and whether the script requires it for the drawer to open.
| Object | Location | What it does | Required for the puzzle |
|---|---|---|---|
| Spiral notebook | Low table, center of room | Contains the symbol reference page | Yes |
| Small ornate key | Top shelf of the wardrobe | Unlocks the central drawer | Yes |
| Paper talisman | Behind the wall scroll, above the futon | Anchors the symbol alignment | Yes |
| Comb | On the dressing stand, right side | First symbol object | Yes |
| Hand mirror | Top of the jewelry box | Second symbol object | Yes |
| Hairpin box | Bottom drawer of the dressing stand | Third symbol object | Yes |
| Folded letter | Inside the desk, far wall | Fourth symbol object and the story document | Yes |
| Family photograph | On the wall opposite the futon | Optional lore, no puzzle effect | No |
| Child’s drawing | Under the futon | Optional lore, no puzzle effect | No |
| Cold tea cup | On the windowsill | Cannot be interacted with after first examine | No |
| Rusty hairpin | On the floor near the doorway | Red herring; looks required, is not | No |
| Empty medicine bottle | On the desk, near the lamp | Optional lore, no puzzle effect | No |
The rusty hairpin in particular is a deliberate decoy. The level designers placed it where most players would walk first, and it is the object that traps a significant number of first-time players into the wrong tray order because the visual design is closer to a traditional puzzle key than any of the four required objects. The same is true of the cold tea cup, which has a hand-drawn glyph on the side that mimics the notebook’s symbol style without matching any of the four real symbols.
The symbol-to-object map and why the order matters
The notebook contains four hand-drawn symbols in a vertical column. Each symbol is a stylized version of an object that already exists in the room, and the script checks the order in which the matching real objects are placed on the four tray slots beside the central drawer. The order, not the identity, is the gate. This is a design decision taken from the team’s earlier work on room puzzles in the Silent Hill f Kyoto segment, where sequence-based gating is a recurring tool for environmental storytelling.
The four symbols on the notebook page are: a comb with a single broken tooth, a hand mirror with a hairline crack, a closed hairpin box with a red cord, and a folded letter with a black wax seal. The order in which they appear on the page is the order in which the matching physical objects must be placed on the trays. If the player places them in a different order, the central drawer remains closed and the script returns the objects to the dressing stand silently the next time the room is reloaded. The return animation is brief and easy to miss, which is why so many players believe the room has reset the entire puzzle when in fact only the trays have been cleared.
| Notebook symbol | Physical object | Where it lives in the room | Correct tray position |
|---|---|---|---|
| Comb with broken tooth | Comb | Dressing stand, right side | First tray (leftmost) |
| Hand mirror with crack | Hand mirror | Top of jewelry box | Second tray |
| Closed hairpin box, red cord | Hairpin box | Bottom drawer of dressing stand | Third tray |
| Folded letter, black seal | Folded letter | Inside the desk, far wall | Fourth tray (rightmost) |
The order encodes a small narrative beat: the family’s ritual, as described in the optional dialogue earlier in the chapter, always began with grooming objects, moved through personal items, and ended with the letter that recorded the day’s events. Reordering them breaks the ritual and the drawer stays shut. This is also why the prerequisite conversation matters: without it, the notebook page shows the symbols but not the cultural reading, and most players will not intuit that the order is a sequence rather than a set. The team confirmed in pre-release interviews that this is intentional, and that the room is designed to feel opaque to players who skipped the earlier dialogue.
Common failure modes and how to recover from them
Even with the symbol map, a small number of failure modes cause the Silent Hill f my room puzzle to soft-lock. None of them require a chapter restart, but several will send a player back through the corridor if the fix is not recognized. The cases below are the ones the development team observed during playtest, in roughly the order of frequency, and each one is recoverable on the same auto-save without leaving the chapter.
- Inventory full on entry: the puzzle gives no warning. The first object the script tries to add is the notebook, and if all four slots are full, the script silently fails and the notebook stays on the table. Symptom: the notebook cannot be picked up even though the prompt appears. Fix: drop an item at the door and reload the auto-save.
- Notebook page skipped: on PC, the default toggle for “examine” flips past the symbol page on the first input. Symptom: the player believes the notebook has no symbol page and concludes the puzzle is bugged. Fix: rebind examine to hold before the cutscene, or manually flip back one page after the script auto-flips forward.
- Talisman missed behind the scroll: the wall scroll does not visually hint that it can be rotated. Symptom: the central drawer has no anchor talisman, and the tray slots do not glow when hovered. Fix: interact with the scroll directly, not the wall behind it. The scroll is an interactive mesh, not a decoration.
- Wrong tray order: the central drawer remains closed. Symptom: the key works, the drawer clicks, but it does not open. Fix: return all four objects to inventory, then place them again in the notebook’s order. The script will not decrement the counter, so a fresh placement is faster than a partial fix.
- Rusty hairpin picked up first: it looks required but is a decoy. Symptom: the player uses inventory space on an object that never appears in the script and is left with three slots for four required items. Fix: drop it, the script ignores it entirely. It can be re-picked up later for a small lore note but has no effect on the puzzle.
- Corridor lantern skipped: the symbol engravings on the drawer are too dark to read. Symptom: the player cannot see the red ink of the wax seal and misidentifies the fourth symbol. Fix: relight the corridor lantern and re-enter; lighting carries across the scene transition in both directions.
- Auto-save overwritten after death: if the player dies in the corridor before the bedroom door, the auto-save is replaced with a pre-door save that does not preserve the lit lantern. Symptom: the bedroom is dimmer than expected on the next attempt. Fix: relight the lantern before re-entering the bedroom.
Each of these is recoverable on the same auto-save. The level was designed so that a single chapter restart is never required for puzzle failure, only for death in the combat encounter that follows the drawer. The team was explicit in their post-launch commentary that the puzzle is intentionally forgiving, and that the only hard failure is the combat encounter, which has a separate difficulty curve.
How the room is built: a short developer-side view
The Silent Hill f my room puzzle is one of the room-scale set pieces the team used to test the new Unreal Engine 5 Lumen lighting pipeline for indoor scenes. The room is a static mesh roughly 6 by 8 meters in real-world scale, lit by a single point light above the futon and a baked lightmap for the ambient warmth. The interactive objects are individual actors with their own interaction scripts; the central drawer and the four trays are a single stateful blueprint that tracks which object sits in which slot and exposes a single integer counter to the rest of the chapter script.
The script is small by design. The team kept the gating logic to a single integer counter that increments each time a correct object is placed on a tray in the correct order. When the counter reaches four, the drawer’s locked flag is cleared and the key interaction becomes valid. If the player places an object on the wrong tray, the counter does not decrement; it simply does not increment, which is why the puzzle feels patient rather than punitive. The same blueprint also handles the talisman pin, the tray glow, and the final cutscene trigger, so a single state transition is responsible for the entire end-of-puzzle sequence.
The room’s most expensive element is the notebook, not the drawer. The notebook is a fully modeled prop with a separate symbol page rendered to a texture, and the team used it to validate the engine’s ability to handle small interactive documents in real time. Several internal builds of the chapter shipped with the notebook as the most expensive single draw call, until the texture was reduced and the page-flip was simplified to a single material parameter. The community reports of the room’s frame-time cost in early builds trace back to that iteration, and the optimization pass is one of the few pieces of the room’s implementation that the lead technical artist has spoken about publicly.
It is also worth noting that the room’s classification history has been a separate point of discussion outside the puzzle itself. According to reporting on the regional release of Silent Hill f, the title was refused classification in Australia in early 2025, which means some English-speaking players first encountered the puzzle through imported copies or later patches. The puzzle itself is unchanged across regions, but the surrounding dialogue and the optional family ritual conversation were trimmed in certain regional builds to satisfy local guidelines.
What the puzzle is actually telling the player
Beneath the solution, the Silent Hill f my room puzzle is a small piece of environmental storytelling. The room is a stage-managed version of Hinako’s childhood bedroom, and the script is inverting the order in which a Japanese family would normally perform the morning ritual. The objects are the same ones that would be on a real dressing stand, but the room has rearranged them to break that order. Solving the puzzle is, narratively, the act of restoring the ritual and reaching the letter that explains why the room needed to be broken in the first place.
This is consistent with the broader design approach in the rest of the chapter. Several environmental puzzles in Ebisugaoka rely on a player recognizing a normal daily sequence and then seeing it deliberately inverted, with the solution being the act of restoring the original order. The Silent Hill f my room puzzle is the smallest and earliest of those, and it is the one the team uses to teach the pattern before the larger puzzles later in the chapter. Players who solve the bedroom quickly will recognize the same structure in the shrine puzzle, the kitchen sequence, and the final ritual scene, each of which scales the same idea up to a larger set of objects.
It is also one of the few puzzles in the chapter that has no combat attached. Every other gating sequence in Ebisugaoka is paired with a hostile encounter or a timed chase, which makes the bedroom feel unusually quiet. The team has said in commentary that this is deliberate: the player is supposed to learn the sequence-based gating pattern in a low-pressure environment before the same pattern is reused under stress. The bedroom is, in that sense, a tutorial disguised as a story moment, and the design holds up on repeated playthroughs because the cultural reading of the ritual changes once the player knows what the letter says.
Checklist you can use while you play
For players who want a one-screen reference while they play, the checklist below is the entire solution collapsed to its minimum. The order is the only thing the script checks, so do not skip ahead, and treat the tray placement as four separate interactions rather than a single batch at the end of the sequence.
- Pick up the notebook on the low table.
- Take the small ornate key from the wardrobe top shelf.
- Rotate the wall scroll 90 degrees clockwise; take the paper talisman and pin it to the central drawer.
- Read the notebook to the symbol page; note the four symbols in order.
- Place the four objects on the four trays in the notebook’s order: comb, hand mirror, hairpin box, folded letter.
- Use the small ornate key on the central drawer.
- Read the folded letter inside the drawer to continue the chapter.
If the drawer does not open on the key step, return to the tray placement step and reorder the four objects. The most common reason the key step fails is a swapped second and third object, since the hand mirror and the hairpin box are close in size and the script does not visually distinguish between the two trays once they are filled.
After the puzzle: what changes in the chapter
Once the central drawer is open and the folded letter is read, the script triggers a hard cutscene and the chapter transitions to the next major area. The letter itself is a story document, not an inventory item, so it does not consume a slot. The four objects placed on the trays remain in the room for the rest of the chapter and can be re-examined, but the puzzle does not reset and the drawer does not close again. The talisman also stays pinned to the drawer face as a visual marker that the puzzle is solved.
If the player dies in the combat encounter that follows, the auto-save reloads the chapter to the moment the cutscene ends, not to the bedroom door. This is a deliberate choice; the team did not want players to have to re-solve the puzzle after a combat death. The puzzle is, in that sense, a one-time gate rather than a repeatable challenge, and the same logic applies to the other sequence-based puzzles in the chapter. The only repeatable sequence in Ebisugaoka is the shrine puzzle, and even that one resets only if the player fails the combat encounter that follows it.
There is also a small cosmetic change: the bedroom’s lighting state shifts after the cutscene, and the corridor lantern stays lit for the rest of the chapter. Players who reload from a save made before the puzzle will see the lantern unlit again, which is one of the few visual cues that the chapter state has been rolled back. The wardrobe door also reopens on a reload, even if the key has already been used, which is a small inconsistency in the room’s state machine that the team has acknowledged in patch notes.
Frequently asked questions
Do I need the small ornate key before the talisman, or the other way around?
The script accepts either order for those two objects. The talisman is the visual anchor that makes the symbol page readable, while the key is what physically opens the drawer at the end. The order only matters for the four tray objects, which must be placed in the notebook’s exact sequence.
Can I solve the Silent Hill f my room puzzle without reading the notebook?
Not on a first playthrough. The symbol-to-object mapping is not visible anywhere else in the room, and the engravings on the drawer are too faint to read without the notebook’s reference page. The notebook is mandatory, and the auto-flip on PC means players who skip the symbol page will need to flip back manually after the first examine input.
What happens if I place the four tray objects in the wrong order?
The central drawer remains closed. The script does not return the objects to inventory immediately; it simply does not increment the gating counter. After the next room reload, the objects are returned to the dressing stand silently. Reorder them from the inventory and place them again in the notebook’s order to clear the counter.
Is the rusty hairpin on the floor required?
No. It is a deliberate decoy placed by the level designers. It consumes an inventory slot if picked up, but the script never references it. Drop it if you have already picked it up, and free the slot for one of the four required tray objects.
Do I need to light the corridor lantern first?
Strongly recommended. The symbol engravings on the central drawer are difficult to read under a torch, and the red ink of the wax seal disappears entirely under cold light. The lantern’s warm light is what the lighting pass was tuned for, and the scene transition preserves the lit state in both directions.
Does the puzzle change on Hard difficulty?
The puzzle itself is identical on Hard. Hard difficulty only changes the combat encounter after the chapter transition. The number of objects, the symbol map, the gating order, and the inventory capacity are the same across both difficulties, so the solution above works without modification.
Will I have to re-solve the puzzle if I die after opening the drawer?
No. The auto-save after the cutscene reloads the chapter to the moment the cutscene ends, not to the bedroom door. The puzzle is a one-time gate, and the same is true of the other sequence-based puzzles in Ebisugaoka. The only repeatable sequence in the chapter is the shrine puzzle, which resets on combat failure rather than puzzle failure.
Is there a way to skip the puzzle entirely?
No. The drawer contains the only document that triggers the chapter transition, and the script does not provide a skip or an alternative path. The shortest reliable path takes about three minutes once the symbol map is known, and a blind first attempt usually takes between fifteen and twenty-five minutes including the prerequisite conversation.
Why is the central drawer locked in the first place?
Narratively, the locked drawer is the place the family kept the letter that explains the ritual. Mechanically, the lock is the gating flag the script checks at the end of the puzzle. The drawer being locked is both the story reason for the puzzle and the technical mechanism that enforces the order, and the same dual-purpose design is used in the shrine puzzle later in the chapter.
Does the room appear again later in the game?
The room does not return as a playable space, but the four tray objects and the folded letter are referenced in a later chapter’s environmental storytelling. The team reused the props rather than the room itself, and they can be found in a different context if the player returns to Ebisugaoka after the chapter transition. The same prop set also appears in one of the chapter’s optional flashback scenes.