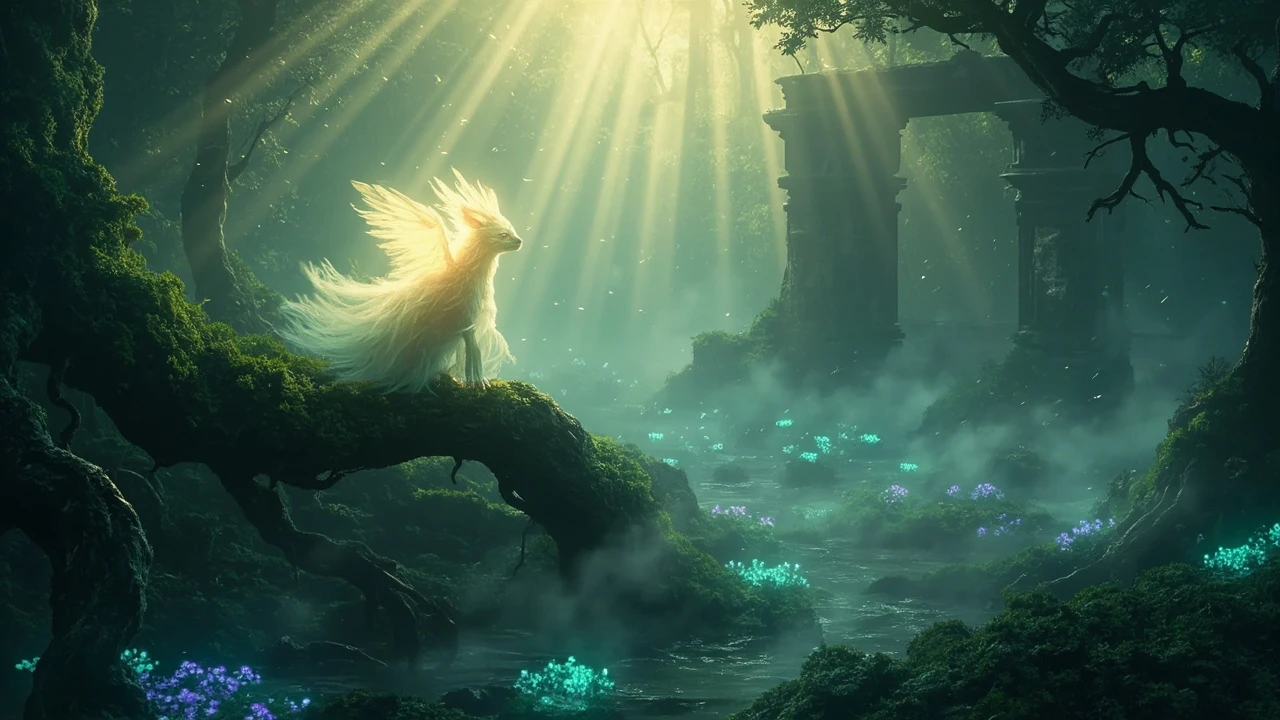
A clean run through the forest of Niwen depends less on twitch reflexes and more on knowing when the game expects you to grow. Ori and the Will of the Wisps walkthrough coverage that works treats the game as a sequence of ability gates, light combat puzzles, and optional exploration layers, because that is how Moon Studios actually sequenced the experience. If you push too hard into side content before unlocking the right spirit shard, the maps start to feel sparse. If you rush the main path too quickly, you will reach a boss you cannot pass and lose momentum.
This guide focuses on the player task: a reliable, decision-aware path from the prologue to the ending, with the shrines, combat abilities, and collectibles tied to the moments they actually matter. It also flags the design choices that influence the order, so you understand why a particular ability or movement upgrade changes your options later on.
Ori and the Will of the Wisps walkthrough: how to plan a first run
Before any specific section, it helps to set expectations. Ori and the Will of the Wisps is a 2D Metroidvania, so a walkthrough is really a recommendation for when to push forward, when to backtrack, and when to chase optional content without losing the main thread. The world is one interconnected map with a handful of soft locks, gated by abilities rather than by keys. The single best planning rule is simple: when you gain a new ability, sweep the area you just left before you leave the region.
For a first playthrough, the practical approach is to play each region in roughly the intended order until the game signals that the next region expects a specific tool, then return to previously visited areas. The game itself is generous with hints through environmental design, but the optional content can stretch a run from a focused 12 hours to 25 or more if you go after every shard, spirit light, and map fragment.
What a useful walkthrough actually covers
Most ori and the will of the wisps walkthrough queries split into a few predictable tasks. A serious guide should give you all of them in one place rather than forcing a player to assemble a path from forum threads and video timestamps.
- Region order, including which area is soft-locked behind which ability.
- Key shrine and boss strategies that gate progression.
- Combat abilities, when to invest in which tree, and what each enables.
- Optional collectibles such as spirit shards, spirit light, map fragments, and life cells.
- Hard mode and spirit trial considerations, since some players want a single guide that covers both.
The rest of this walkthrough is built around those points in that order, so you can jump directly to a region or read it linearly if you are on a first run.
Recommended first-run settings and loadout choices
The default difficulty of Ori and the Will of the Wisps is reasonable for most players, but a few setup decisions will affect the rest of your run. These are choices you can make in the first hour, and they are the kind of thing a complete walkthrough should not skip.
- Map orientation: keep the map on screen in its first form, even if you find it overwhelming. Map fragments in this game are a progression tool, not a flavor collectible, because they reveal energy and health cell locations.
- Combat pacing: the bash ability is given to you early, but it also doubles as a movement tool. Practice on standard enemies before you rely on it in platforming puzzles.
- Spirit light economy: resist spending spirit light on low-cost upgrades just to spend it. A few key abilities change entire sections; small numeric upgrades rarely do.
- Exploration mindset: the game wants you to be curious. The fastest path is rarely the most rewarding one, but it is also rarely required for the main story.
These are not rules. They are default positions you can change if a section feels too easy or too hard. The rest of the walkthrough assumes you have made these decisions and that you are willing to backtrack when an ability unlocks a previously sealed area.
Region-by-region progression path
The map of Niwen is one connected space, but the game does push you through regions in a specific order. The table below shows that order at a high level, with the main ability that unlocks each transition and the kind of content you should expect in that region. It is not a spoiler-free table; the assumption is that a walkthrough reader is willing to know that Inkwater Marsh comes before Mouldwood Depths.
| Order | Region | Unlocking ability or condition | Main activities | Optional content focus |
|---|---|---|---|---|
| 1 | Swamp and Inkwater Marsh | Prologue to first ability unlocks | Tutorial combat, light platforming, first spirit wells | Spirit light farming, basic combat shards |
| 2 | Kwolok’s Hollow and Wellspring | Bash upgrade, basic swim | First major boss, vertical platforming, underground wells | Map fragments, life cells, wells |
| 3 | Mouldwood Depths | Burrow ability | Underground traversal, poison hazards, mid-game bosses | Spirit shards that benefit underground sections |
| 4 | Windswept Wastes and Luma Pools | Double jump and glide | Wind puzzles, long platforming chains, light races | Glide-related spirit shards, hard-to-reach arenas |
| 5 | Baur’s Reach and Windswept Wastes (north) | Launch and dash upgrades | Speed-based platforming, ranged combat, vertical arenas | Optional high-tier shards and map cleanup |
| 6 | Wellspring and final regions | Late-game abilities and energy cells | Backtracking with full kit, late bosses | Remaining spirit trials, life cell upgrades |
The exact order in any given run can shift by an hour or two depending on the optional content you chase, but the general flow is stable. Use this as a planning reference and adjust based on what feels like the right difficulty curve for you.
Early game: prologue through Inkwater Marsh
The game opens in a snowy prologue, and the first real stretch of forest begins once Ori reaches Inkwater Marsh. The early game is more linear than it feels, and the game uses environmental cues rather than explicit markers to push you forward. The main things to learn here are combat timing, the use of bash as both a defensive and a movement tool, and the first taste of how the map system works.
If you are following an ori and the will of the wisps walkthrough and want a clean opening, the practical priorities are simple: learn bash, then learn to use the energy system efficiently, then return to clean up any areas you skipped. The first boss in the Marsh is more of a test of patience than a test of skill, and any walkthrough that overcomplicates it is overcomplicating a designed tutorial.
Combat and spirit light economy in the Marsh
You start with a small set of attacks and one defensive option. The Marsh introduces the most common enemy types in the game, and each one teaches a specific timing or spacing lesson. The combat system in this game rewards a small set of moves done consistently, not a large set of moves used occasionally, so resist the urge to spend spirit light on damage upgrades until you know which combat shards you actually want to use.
A short list of decisions that affect the rest of the run:
- Spend on the first energy cell upgrade before spending on raw damage.
- Hold back from filling every combat shard slot; a small loadout of two or three shards is usually enough for most fights.
- Use the bash ability defensively at first. Players who try to use it aggressively in the first hour often find it less effective than the standard light attack.
These are not mandatory, but they are the kinds of choices that show up again in late-game combat, so it is worth forming habits in the Marsh that you are willing to keep.
First major ability unlocks and what they open up
The first half of the game hands you abilities in a specific order, and each one opens new map areas. Understanding which ability opens which region is the difference between a smooth playthrough and one where you wander into dead ends for hours. The list below is not a chronology of every ability, but rather a list of the abilities that change your map options in a meaningful way.
- Bash and Bash upgrades: open most early vertical platforming puzzles and let you reflect projectiles, which simplifies several boss fights later.
- Burrow: opens underground sections, lets you move through sand, and unlocks Mouldwood Depths content that was previously sealed.
- Double jump and glide: open the wind-heavy regions and the Luma Pools areas that require longer air time.
- Launch and dash: open high-speed sections, Baur’s Reach platforming chains, and many optional combat arenas.
- Grapple and regeneration pulse: come later and open the final cleanup pass, especially for life cell upgrades and map fragments in high places.
A walkthrough that focuses on the moment of unlock is more useful than one that just lists abilities, because the moment of unlock is the right time to backtrack. If you are in a region when you unlock double jump, it is almost always worth returning to the previous region before continuing the main path, because a meaningful share of optional content is gated by movement upgrades rather than by keys.
Mid game: Mouldwood Depths and the Wellspring revisit
The mid game is where the game stops being linear. After you have the burrow ability, Mouldwood Depths becomes available, and the underground sections open up. The Wellspring, which you visited earlier in the game, also reopens with new content gated by the new abilities. This is the part of an ori and the will of the wisps walkthrough where most players either get a focused path or get lost.
The advice here is to treat the mid game as a series of round trips rather than a single line. Pick one region, clear the main path, then sweep the same region for optional content before moving on. The main story gives you a clear next objective, but the optional content is what gives the map its texture, and it is where most of the spirit shards come from.
Optional content priorities in the mid game
Not all optional content is equally valuable, especially for players who want a complete but not obsessive run. The list below is a sensible priority order, not a checklist.
- Map fragments, because they reveal the location of life cells and energy cells in the same region.
- Life cell upgrades, because they raise your maximum health and the mid game is where most deaths happen.
- Energy cell upgrades, because they raise the number of spirit shards you can equip and they gate the late game.
- Spirit shards that match your combat style, especially the ones that improve mobility rather than raw damage.
- Quest chains, because they often unlock vendors that sell otherwise hard-to-find upgrades.
Avoid spending too much time on spirit trials before you have the full movement kit. Many spirit trials are designed for late-game movement, and trying them with a partial kit is a quick way to lose time without gaining much progress.
Late game: Windswept Wastes, Baur’s Reach, and the final push
The late game of Ori and the Will of the Wisps focuses on mobility-heavy platforming, the final set of boss fights, and the cleanup pass that turns the map from about 80 percent complete to 100 percent. The Windswept Wastes section requires glide and double jump, and Baur’s Reach requires the dash and launch upgrades. By the time you reach the final region, you should have most of the ability kit, and the game expects you to use it.
A good late-game walkthrough covers two things in particular: the order in which to tackle the final regions, and the boss strategies for the most punishing fights. Most of the late game can be approached in any order, but the boss in Baur’s Reach is significantly easier once you have cleaned up the Wellspring energy cells, because the extra energy gives you more spirit shard combinations for the fight.
Boss strategies that actually matter
Most bosses in this game are designed as movement tests with combat layered on top. The most common mistake is to over-invest in damage shards before a boss fight, when the fight actually requires more defensive movement than raw damage. The list below is a small set of general rules, not a per-boss guide, but it covers the cases that come up most often.
- Keep your distance until you understand the boss’s attack pattern, especially on first contact.
- Use bash as a movement tool first and as a defensive tool second. Reflecting a projectile should be a side effect of your positioning, not the main plan.
- Save your most expensive spirit shard combinations for the second half of a boss fight, after you have learned the phase transitions.
- For multi-stage bosses, focus on staying alive through the first stage rather than on skipping it. The pattern changes at the transition, and dying at the transition is the most common late-game cause of lost runs.
These rules are not unique to this game, but they are particularly relevant here because the boss design rewards consistency over burst.
Collectibles: what to chase and what to ignore on a first run
Ori and the Will of the Wisps has a wide range of optional collectibles, and a serious walkthrough needs to help you decide which ones are worth the time on a first playthrough. Not every collectible is equally valuable, and not every map fragment is worth a long detour. The table below organizes the main collectible types by their practical effect on a first run.
| Collectible | Effect | Worth chasing on a first run? | Where they are most common |
|---|---|---|---|
| Spirit light | Spend on ability upgrades at spirit wells | Always, but spend on energy and life cells first | Throughout every region |
| Life cell | Increases maximum health by one unit | Yes, especially in mid game | Map fragments reveal them; common in vertical sections |
| Energy cell | Increases maximum energy, lets you equip more shards | Yes, gates late-game combat loadouts | Wells, underground sections, late game |
| Spirit shard | Passive combat or movement modifier | Selective, prioritize a small loadout | Combat arenas, optional caves, hidden rooms |
| Map fragment | Reveals more of the current region | Yes, especially if you want the collectibles that follow | High places, behind ability-gated walls |
| Quest item | Unlocks vendor stock or bonus upgrades | Yes, especially before late-game vendors | Hidden NPCs, optional caves |
The list is not a checklist, and the recommended order can shift based on your play style. If you prefer a lean run, focus on life cells and energy cells and ignore most of the spirit shards. If you prefer a rich run, sweep each region thoroughly before leaving and accept that the run will be longer.
Spirit shards and combat loadout decisions
Spirit shards are the most flexible upgrade system in the game, and they are also the easiest to over-invest in. Each shard uses a small amount of energy, and you can only equip as many shards as your current energy cells allow. A complete walkthrough should give you a way to think about the shard system rather than just a list of shard effects, because the right loadout depends on the section you are about to play.
For additional context, One useful mental model is to divide shards into three roles: movement, defense, and offense. Most players benefit from a loadout that emphasizes movement and defense, with offense as a smaller share. The game rewards positioning more than damage, and shards that improve movement tend to be valuable in more sections than shards that improve a single damage type.
- Movement shards: useful in nearly every section, including boss fights, exploration, and platforming.
- Defensive shards: useful in sections with high enemy density or punishing boss patterns.
- Offensive shards: useful in short bursts, especially in late-game boss fights, but rarely worth equipping during exploration.
You do not need a deep theory of shards to enjoy the game. The reason to mention this in a walkthrough is to help you avoid the most common first-run mistake, which is to fill every shard slot with offensive shards and then struggle with the platforming sections because the loadout is poorly matched to the task.
Boss fights in order of expected difficulty
Boss fights in this game are one of the more reliable sources of player frustration, especially on a first run. The list below is ordered by the typical first-run difficulty curve, not by the game’s internal order. If you find one boss much harder than the previous, that is usually a sign that your energy or life cells are behind where they should be, not a sign that you are bad at the game.
- Early game bosses are tutorial-like and are designed to teach a specific movement or combat pattern.
- Mid game bosses assume you have at least one full bar of life cells and a basic spirit shard loadout.
- Late game bosses assume you have full movement and a refined loadout, and they reward precision over aggression.
If a fight feels unfair, the most useful question is not “how do I dodge this attack” but “what ability or upgrade am I missing.” The answer is often an energy cell, a specific spirit shard, or an earlier optional upgrade that you skipped. This is one of the most useful pieces of advice in any ori and the will of the wisps walkthrough: a fight that feels impossible is often a sign that the game is asking you to invest in a different upgrade before you continue.
Hard mode and spirit trials
Once you have completed the main story, the game offers additional challenges through hard mode and spirit trials. Hard mode is a new run with a small set of modifier rules, and spirit trials are short, focused platforming arenas. A complete walkthrough should at least mention these, because they are the most common follow-up questions after the main run is done.
Hard mode is best approached after at least one full playthrough, because the modifier rules stack with enemy density and the cost of mistakes is higher. Spirit trials are best approached after you have a full movement kit, because some of them require late-game movement chains that a partial kit cannot complete efficiently. Neither is required to enjoy the game, but both are designed for players who want more challenge after the credits roll.
Common mistakes that slow down a first run
Most first-run problems in this game come from a small set of recurring patterns. A walkthrough that names these explicitly is more useful than one that only describes the correct path, because the mistakes are easier to fall into than the right approach is to find on your own.
- Rushing the main path before investing in life cells or energy cells.
- Ignoring optional content and then struggling with late-game combat because of a thin spirit shard loadout.
- Failing to backtrack after a new ability is unlocked, missing large parts of the map.
- Spending spirit light on damage upgrades before movement or capacity upgrades.
- Skipping map fragments, which then hides the location of life and energy cells in the same region.
None of these mistakes is fatal, and the game is forgiving about most of them. They are listed because the cost of correcting them later is higher than the cost of avoiding them earlier, and a walkthrough is a good place to flag that asymmetry.
How a walkthrough helps different player types
Not every player wants the same kind of walkthrough. The most common reader profiles are completionists, story-first players, and speed-focused players. A good walkthrough acknowledges these and explains how the path changes for each.
- Completionists benefit from the collectible priority table earlier in the guide, because it tells them which optional content to chase first and which to leave for later.
- Story-first players benefit from the region order, because it tells them when to push forward and when the next story beat is ready to trigger.
- Speed-focused players benefit from the list of common mistakes, because avoiding the time sinks is more impactful than optimizing the fast path itself.
This kind of segmentation is not necessary for the game to be enjoyable, but it is a useful way to use a walkthrough as a planning tool rather than a script. The goal is to make the path fit the player, not the other way around.
Build awareness: design choices that shape the walkthrough
Some of the most useful things to know about an ori and the will of the wisps walkthrough come from the way the game was built, because the design decisions directly affect the kind of path the game expects. A small number of design choices explain why the progression order looks the way it does.
Moon Studios built the game as a direct follow-up to Ori and the Blind Forest, and the visual and combat systems are designed to support exploration rather than to gate it. The world is one connected map, and the abilities are given to you in an order that the designers believed matched the natural difficulty curve. The optional content is layered on top of the main path, not bolted on, which is why a clean playthrough still feels complete even if you skip a lot of the optional content.
For players who care about the design side, a useful external reference is the Verge feature on how Ori and the Will of the Wisps improves one of the best-looking Xbox games ever, which covers the art and design choices that shaped the game’s visual identity. It is not a walkthrough, but it is the kind of context that makes the design decisions in this game easier to understand.
For readers who want a broader look at the game, the Wikipedia article on Ori and the Will of the Wisps is a useful summary of the release, reception, and design lineage that frames the gameplay decisions described in this guide.
Quick checklist for a focused first run
If you want a short, practical summary that you can keep open while playing, the list below captures the core advice of this walkthrough. It is not a replacement for the rest of the guide, but it is enough to keep a first run on track.
- Invest in life cells and energy cells before raw damage.
- Backtrack to the previous region every time you unlock a new movement ability.
- Treat optional content as a way to round out your loadout, not as a way to fill a checklist.
- Use a small, focused spirit shard loadout rather than a large, scattered one.
- Read the room in boss fights. If a fight feels impossible, the answer is often an upgrade you skipped, not a new dodge pattern.
If you follow those five points, the rest of the walkthrough is mainly a reference for the specific sections where the game asks you to make a hard decision.
Frequently asked questions
How long does a first playthrough of Ori and the Will of the Wisps take?
A focused first run on the standard difficulty usually takes around 12 to 15 hours if you stick to the main path. A more thorough run that includes most of the optional content and several spirit trials can stretch to 20 to 25 hours. The exact length depends on how aggressive you are with side content, because the game does not time-gate anything outside of the soft ability locks.
Do I need to play Ori and the Blind Forest before this game?
No. Ori and the Will of the Wisps is a standalone sequel, and the story begins with a brief recap of the previous game. You will not be lost mechanically if you start with this title, although you will appreciate the visual and emotional callbacks more if you have played the first game.
What is the best early-game ability to invest spirit light in?
Energy cell upgrades are the most impactful early investment, because they let you equip more spirit shards and they gate late-game combat. Life cell upgrades are a close second, because they increase your survivability in the mid game where most deaths happen. Damage upgrades are a distant third on a first run, because positioning matters more than raw damage in this game.
When should I start chasing optional content?
Optional content makes the most sense in the mid game, after you have the burrow and double jump abilities. By that point, you have enough movement to reach most of the optional content, and you have enough combat experience to know which spirit shards you actually want. Trying to do too much optional content in the first hour is usually inefficient, because the abilities you need are not yet unlocked.
Are there missable items I should worry about?
There are no truly missable story items, but there are several spirit shards and quest rewards that are easier to miss than to backtrack for. A clean run should aim to clear each region of its optional content before moving on, because backtracking for a single shard is usually more expensive than clearing the region as you pass through.
What is the difference between hard mode and spirit trials?
Hard mode is a full new run with a set of modifier rules that change the difficulty. Spirit trials are short, optional platforming arenas that test specific movement skills. They are separate systems, and either can be approached after the main story without affecting the other.
Can I finish the game without finding every collectible?
Yes. The main story has a clear ending, and none of the endings require a specific collectible count. The collectibles that affect ending variation are tied to a small set of quest chains, not to the total number of shards or spirit light collected.
How does the game decide which ending you get?
The endings are tied to the resolution of a small number of in-game quest chains, particularly the chains related to the larger spirit NPCs. The game does not use a hidden morality or completion score to pick an ending, and you do not need to find every shard or map fragment to reach the most rewarding ending. The decision points are story-driven, not collection-driven.
What should I do if I get stuck on a specific shrine or puzzle?
The most common cause of a stuck shrine is an ability you have not yet unlocked. Step back and check whether the shrine requires burrow, double jump, glide, or a specific spirit shard. If the shrine truly does not respond to any of your abilities, it is almost certainly a quest shrine that requires a specific story state, and the solution is to advance the main path before returning.
Is this walkthrough useful for a second playthrough or hard mode?
The general path is the same, but the priorities shift. On hard mode, you should invest in life cells and energy cells earlier, you should treat optional content as a higher priority, and you should plan your spirit shard loadout for the most punishing fights rather than for general exploration. The region order in the table above still applies, but the timing within each region should be more aggressive on hard mode.